These days, it seems like the future of software developers is bleak with the rise of no-code platforms. Fortunately, there’s a way to make ourselves more efficient today by leveraging our existing skills to build new apps using low-code platforms. Unlike no-code, low-code platforms are more flexible and offer greater customizable features. You can write custom code snippets and install Node.js packages to give your app more advanced features.
In this article, I’ll present a high-level overview of Back4App, a Backend-as-a-Service(BaaS) platform that hosts Parse applications for developers. BaaS platforms allow developers to quickly develop and launch new back-end apps with minimum effort. They also eliminate the need to set up hosting and configuring autoscaling, which can be a time-consuming task for developers.
What is the Parse Platform
The Parse platform is a popular, open-source framework for building application back ends. It runs on Node.js and is written to work with Express.js. Simply put, it’s like an open-source version of Firebase that you can run on your machine and host on your own server.
The origins of the project date back to 2011, when Parse Inc was founded to provide a back-end tool for mobile developers. The startup raised $5.5 million in venture capital funding, which allowed it to grow its user base to 20,000 developers within a year.
The company became so successful that it was acquired two years later by Facebook for $85 million. By 2014, the platform was hosting about 500,000 mobile apps. Unfortunately, Facebook failed to invest in the development of the platform and decided to shut down the service by January 2017. In order to assist its customers, Facebook open-sourced the Parse platform so as to allow developers to migrate their apps to their own self-hosted Parse server.
Since then, the open-source community has continually worked on the project and has built a website, online documentation and community forum. Today, Parse provides a number of back-end features that include:
- database management
- file object storage
- REST and GraphQL APIs
- authentication
- user permissions
- live queries (real-time data)
- push notifications
- cloud functions
- cloud jobs
The Parse platform is mainly made up of:
- Parse Server: a headless server for building back-end apps.
- Parse Dashboard: a front-end user interface built with React.
- Parse Server Modules: a collection of modules and adapters that extends Parse Server’s features. For example, you can install an adapter to leverage Firebase’s authentication service.
- Client SDKs: language libraries for connecting front-end apps to Parse Server. These libraries include JavaScript, Android, Objective C, Flutter, Unity and many others.
Note that there are several Parse projects that I haven’t mentioned here. For example, there are Android and IOS apps that provide front-end interfaces for Parse server.
Mongo vs PostgreSQL
Parse server currently supports Mongo and PostgreSQL databases, which are the leading databases in the NoSQL and SQL spaces respectively. Both databases are quite capable, which makes it difficult to choose which one to go with.
This detailed guide may be of assistance. In my opinion, if you’re a beginner, MongoDB is a better choice, as it’s more flexible and has a shallower learning curve. If you’re an experienced SQL developer, you’d be more productive with PostgreSQL. Below is a quick comparison for each database.
Mongo
Pros:
- flexible schema: best for new projects whose requirements aren’t fully known
- horizontal scalable: can easily server millions of users
- supports realtime data updates and reads; great for analytical applications
- sharding: can handle massive datasets easily
Cons:
- Lacks referential integrity
Previous issues like ACID compliance and JOINS are now officially supported in the latest versions of MongoDB.
PostgreSQL
Pros:
- rigid schema: best for projects with known requirements and strict data integrity
- referential integrity/foreign key constraint support: requirement for defining table relations
- out-of-the-box support for ACID transactions
- uses SQL, the best query language for accessing and manipulating data
Cons:
- longer learning curve
- can only scale vertically; horizontal scaling is possible but not easy
If you’re still confused about which one to use, fortunately Back4App has an answer for you.
Back4App
Back4App is a cackend-as-a-service company that hosts Parse server apps for developers at an affordable rate. It greatly simplifies the development of Parse apps. All you need to do is to sign up for a free tier account (no credit card) to get started with 250MB of data storage and 25k requests.
Paid plans offer larger resource quotas and more features such as backups, data recovery, CDN, auto scaling and high request performance. The free plan only is only recommended for learning, while the paid plans are capable of handling thousands of requests per second. See the full pricing page for more details.
Multi-tenant dashboard
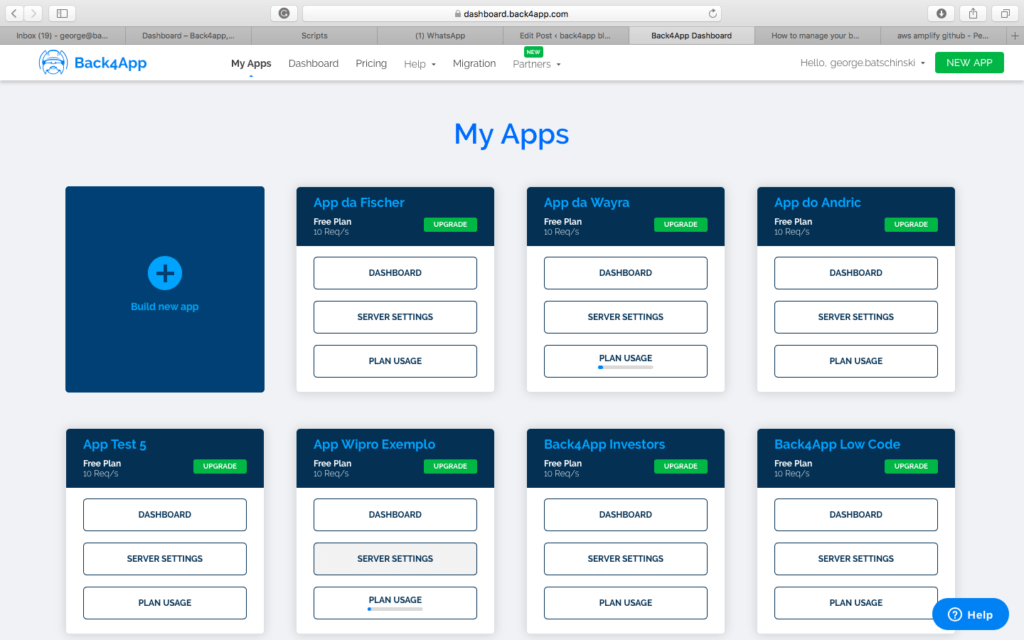
Back4App allows you to create and manage multiple Parse apps on the same dashboard. This is a huge time saver compared to manually installing, configuring and hosting each parse server yourself. The difference is minutes vs hours.
Database browser
Back4App uses Mongo for the database. However, it behaves as if it’s running PostgreSQL. This is great, since you get the advantages of SQL databases while using a non-SQL one — such as referential integrity, foreign key constraints and schema validation. This implementation is done in code and runs between the database and the dashboard.
The database browser organizes tables (collections) as classes and data is laid out in a spreadsheet format. You can add/edit/delete/reorder columns, specify data types, and import/export data in CSV or JSON formats.
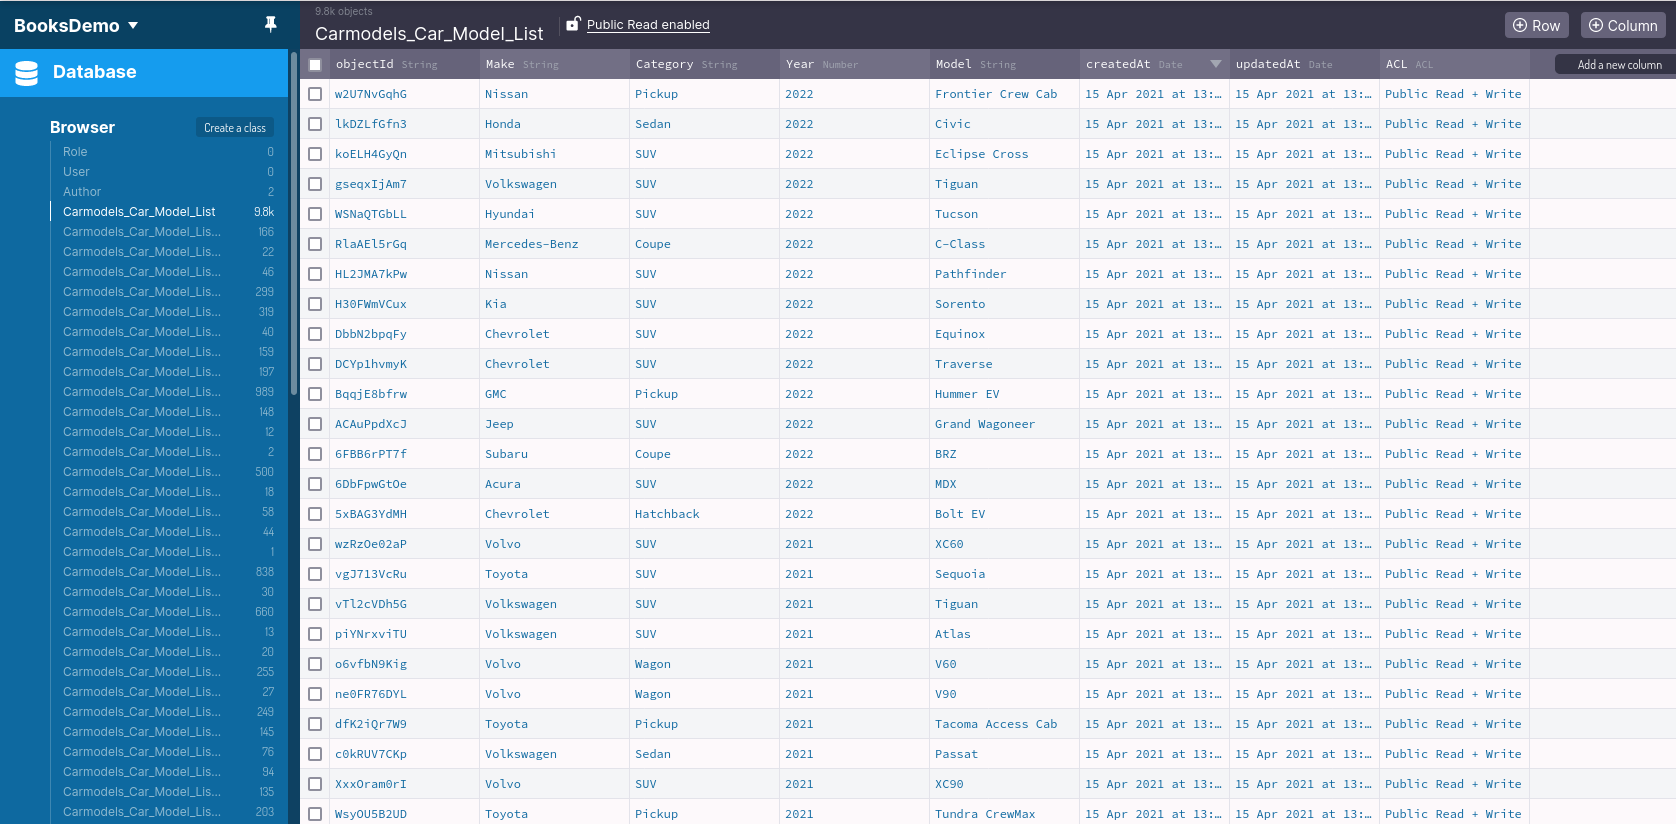
The spreadsheet interface allows you to create and edit rows of data easily. You can also upload binary files such as images or PDFs into columns that have the File data type. This is another huge time saver, as you don’t need to configure a file storage service to handle binary data. With Parse, it’s already built-in and configurable to support external file storage services.
Authentication
Parse provides a built-in email/password authentication service. Users and roles are stored in the database and can be viewed and created via the database browser. Users can also be created programmatically via SDK, REST or GraphQL API endpoints.
Here’s an example of a sign-up function implemented on the front end using the Parse JavaScript SDK:
function signUp() {
  let user = new Parse.User();
  user.set("username", "alex");
  user.set("password", "abc123");
  user.set("email", "a@abcd.com");
  try {
    user.signUp(); // Everything worked and the user signed in
  } catch (error) {
    alert("Error: " + error.code + " " + error.message); // Oops.. something wrong happened
  }
}
Back4App allows developers to enable email verification and password recovery features for their Parse apps. These are essential account management features that users expect when using any secure application.
In addition to the default authentication method, you can enable your Parse app to authenticate using any of the following sign in methods:
- Apple
- GitHub
- and many more
Authorization
Authorization determines if an authenticated user has access to information stored on the database. Permissions are defined with the use of Roles and Access Controls. There are two levels of access controls:
- Class-level permissions (CLP) : this type of permission protects all the data in a class(table). You can define different read and write policies for each role using CLP.
- Object-level access control: This type of permission protects individual rows. This allows one user’s data to remain separate from another user within the same class (table). Parse also supports separating data for anonymous users using sessions.
Parse uses access control lists (ACL) to protect private data from being publicly accessible. However, if the user has some data that needs to be shared publicly, a second ACL needs to be created in order to grant public access. Do note that class-level permissions will always override ACL permissions.
Blockchain database
This is a new feature that allows storing data in a private Ethereum blockchain network. Blockchain differs from a traditional database in that, once records are inserted and verified, they can’t be updated or deleted. This has many practical implementations where trust between parties is critical in a business transaction.
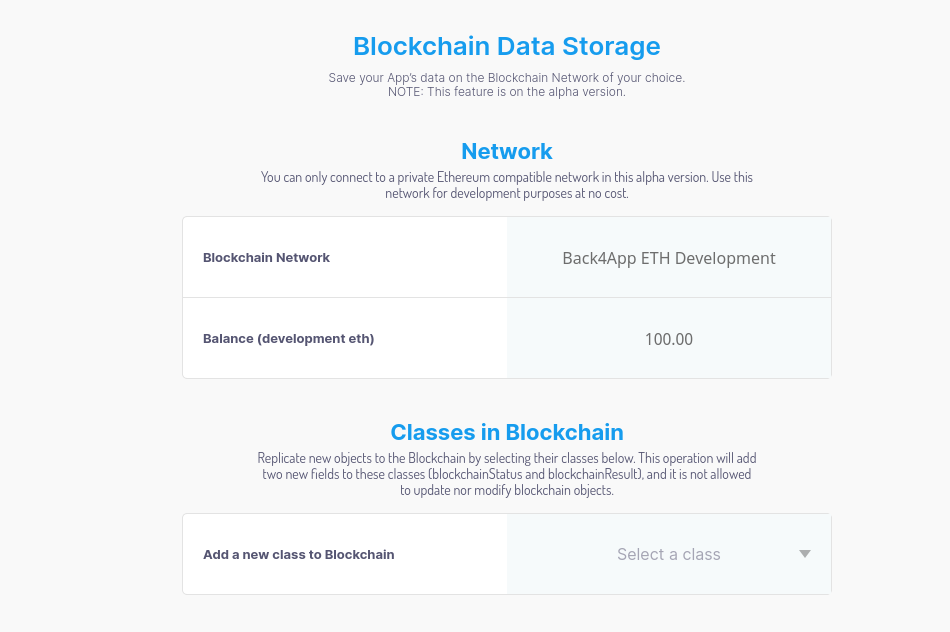
At the time of writing, this feature is still in the alpha stage.
Public Datasets
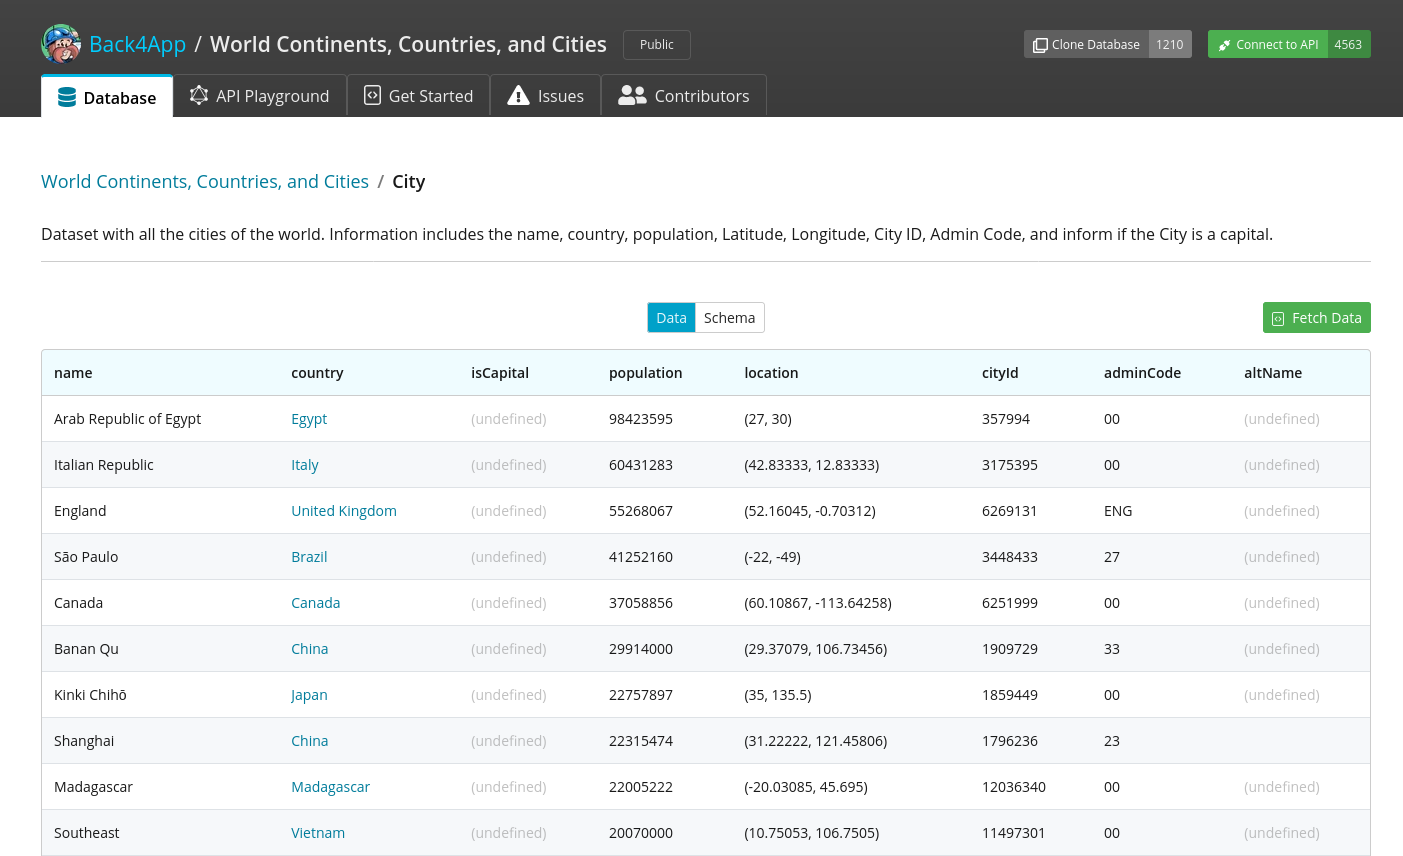
Often when building user interfaces, you’ll need to populate certain input elements with data such as list of countries, cities, zip codes, vehicle models, colors, and so on. Back4App solves this problem by providing the Database Hub, a list of public databases that you can freely access and use for your app.
A dataset example of all the cities of the world is pictured below:
There are three ways of accessing a public database:
- You can connect a public database to your app. Once the connection is successful, you can query the database via REST or GraphQL via your app. This method allows your app to receive any new updates to the schema and data.
- You can clone the public database to your dashboard in a new app.
- You can export a public database into CSV or JSON format, and then import it into your app.
The last two methods allow you to modify the public datasets as you like.
Live query
When building real-time applications, you may be forced to fetch new data every one or so seconds in order to check if there’s been any new update. This technique is known as polling, and it’s problematic, because it causes high network and server usage. Imagine if your app is being used by tens of thousands of users.
Parse has a built-in protocol known as LiveQuery that allows clients to subscribe/unsubscribe to a LiveQuery server. When the relevant data is updated, the LiveQuery server pushes the new data to all clients that have subscribed to it.
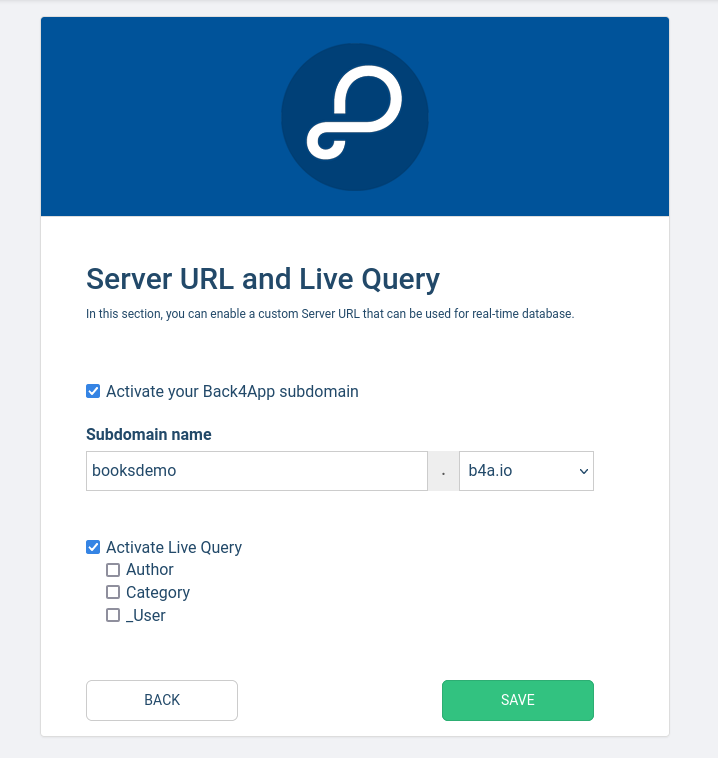
With Back4App, activating the LiveQuery server is as simple as going to your App’s Server settings > Server URL and Live Query and activating it.
Cloud Code Functions
With front-end–heavy applications, a lot of data manipulation is done on the client device. Often this requires sending huge amounts of data so that the front-end code can process and use it to display a summary of the information. End users are likely to experience sluggishness using your app.
Parse provides a built-in feature known as Cloud Code Functions that allows all the heavy data lifting to be performed on the server itself. For example, if you want the average sale value of a specific product in the last year, you can simply retrieve all the necessary data within the server environment, perform the calculation and send the value to the front-end client.
Performing such actions on the server is quicker, more efficient, and will result in a smoother experience for the end users. Another benefit of Parse’s Cloud Function is that it runs in a full Node.js environment, unlike AWS Lambda and Cloudflare Workers. This means you can install any Node.js package you want without having to resort to workarounds.
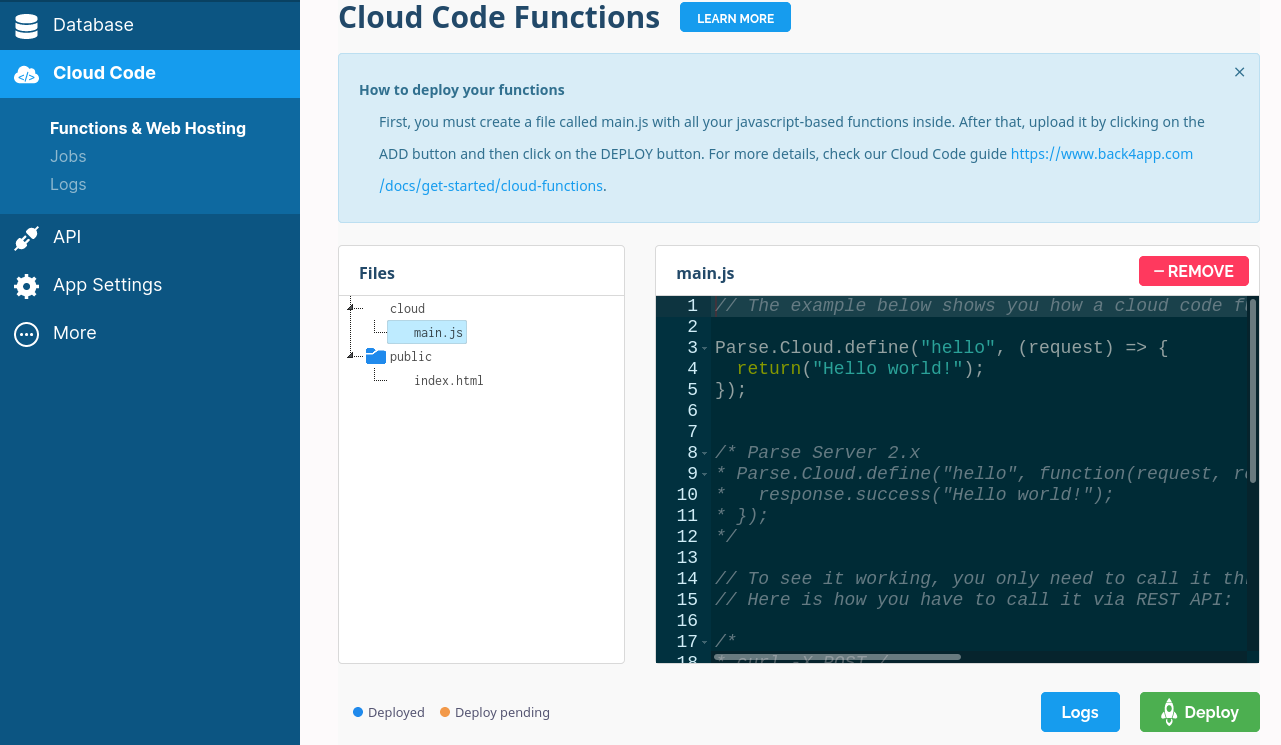
Here are examples of Cloud Code Functions that run on your Parse Server app:
// This is a hello function and will log a message on the console
Parse.Cloud.define("hello", async (request) => {
  console.log("Hello from Cloud Code!");
  return "Hello from Cloud Code!";
});

// This sumNumbers function accepts JSON parameters via the request object.
Parse.Cloud.define("sumNumbers", async (request) => {
  return request.params.num1 + request.params.num2;
});
Here’s how you can call Cloud functions from your frontend app:
const helloResult = await Parse.Cloud.run("hello");

const params = { num1: 3, num2: 4 };
const sumResult = await Parse.Cloud.run("sumNumbers", params);
You can also implement advanced features with Cloud Code Functions, such as sending SMS text messages to any phone using the Twilio API:
Parse.Cloud.define("SendSMS", async (request) => {
  // Requiring the values to send
  let getMessage = request.params.message,
    getPhoneTo = "+Target test Phone number",
    getPhoneFrom = "+Your first Phone number",
    accountSid = "AccountSID",
    authToken = "AuthToken";

  // require the Twilio module and create a REST client
  let client = require("twilio")(accountSid, authToken);

  return await client.messages.create({
    body: getMessage, // Any number Twilio can deliver to
    from: getPhoneFrom, // A number you bought from Twilio and can use for outbound communication
    to: getPhoneTo, // body of the SMS message
  });
});
Other advanced examples of cloud functions you can implement in your Parse Server app include accepting credit card payments via the Stripe API and sending emails via the SendGrid API.
Triggers
Triggers are cloud functions that allow you to implement custom logic such as formatting or validation before and after an event. Take a look at the validation code example below:
Parse.Cloud.beforeSave("Review", (request) => {
// do any additional beforeSave logic here
},{
  fields: {
    stars : {
      required:true,
      options: stars => {
        return stars >= 1 && stars =< 5;
      },
      error: 'Your review must be between one and five stars'
    }
  }
});
In this example above, the validation code ensures that users can’t give less than a one- or more than five-star rating in a review. Otherwise, the client will receive an error. Parse currently supports the following types of triggers:
- save triggers: useful for enforcing a particular data format
- delete triggers: useful for implementing deletion policies
- find triggers: useful for transforming data
- session triggers: useful for blocking a banned user or tracking a login event
- LiveQuery triggers: useful for implementing limits
With Cloud Code, you can ensure the same behavior for all the client apps that you support — such as web, Android, iOS, and so on.
Cloud Jobs and Scheduling
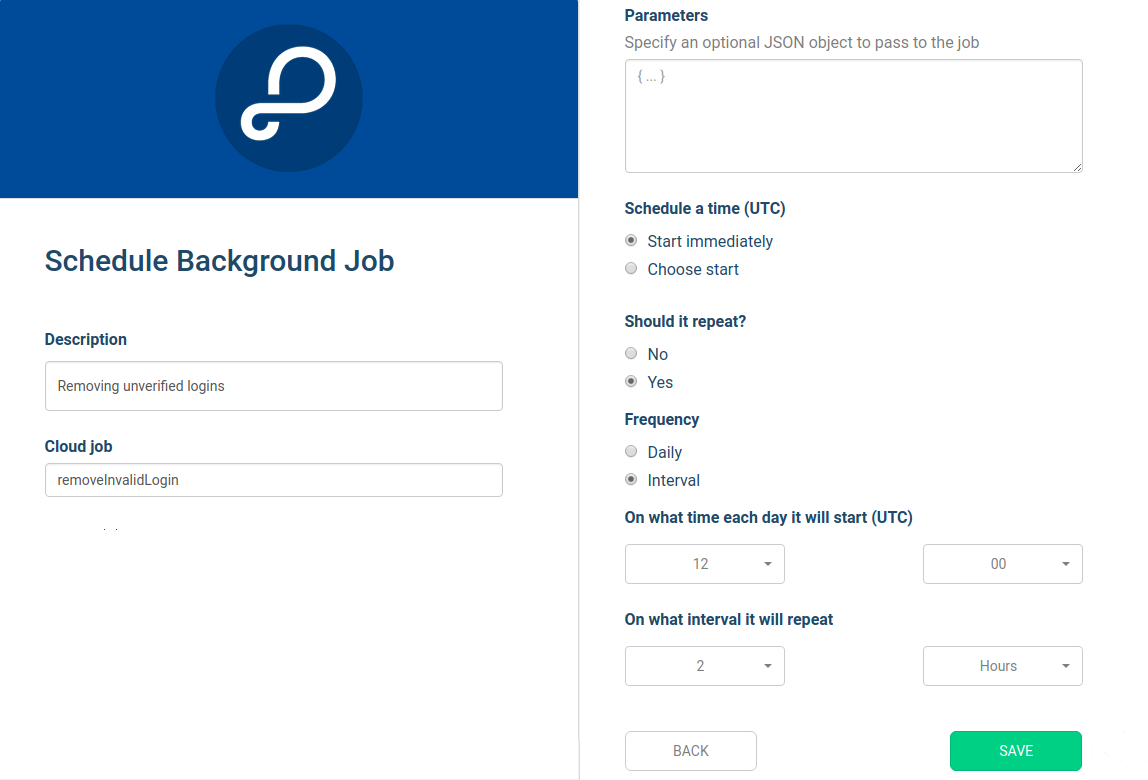
Cloud jobs are simply long-running functions where you don’t expect a response. Examples include batch processing a large set of images, or web scraping. You can also use cloud jobs to perform tasks such removing inactive users that haven’t verified their emails.
Do note Parse server doesn’t provide scheduling. Fortunately, Back4App does — through a feature known as the Cron Job. You simply write a cloud function in this format:
Parse.Cloud.job("jobName", async (request) => {
  // write your code here
  return "job results";
});
Next, you upload the cron job code to your app, and then you use the Background jobs feature to schedule when your code should run.
Modules and Adapters
You can further extend the capabilities for your Parse server app by installing Node.js packages and Parse Adapters. The image below shows some of the adapters maintained by the core Parse community.
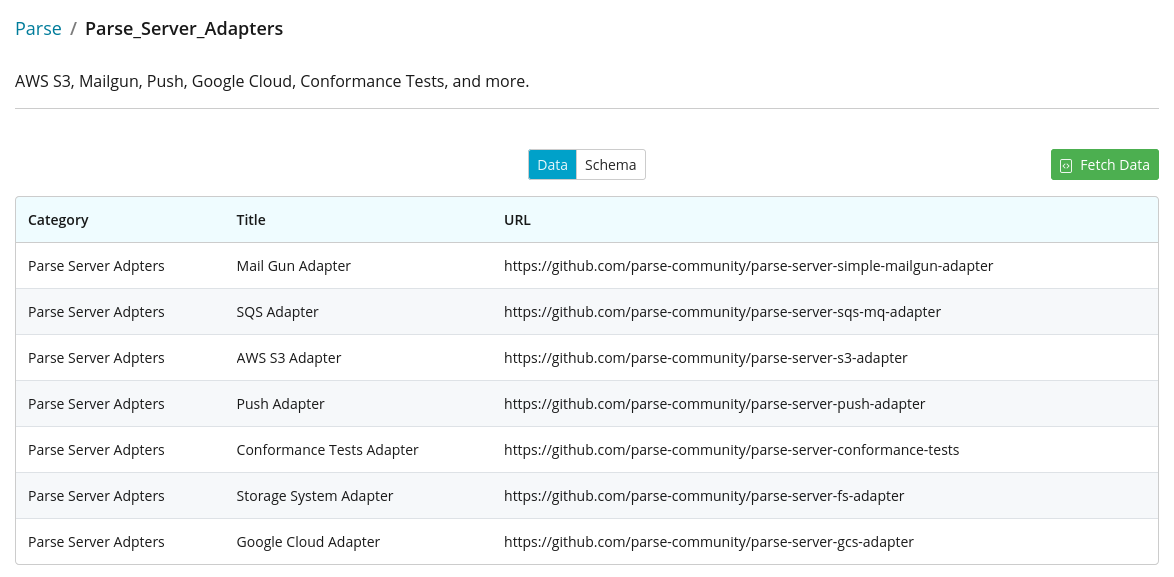
Adapters are simply Node.js packages that can be installed by uploading a package.json file to your Cloud Functions dashboard. An example of an adapter is the parse-server-sqs-mq-adapter which enables integration with of a Parse Server app with Amazon Simple Queue Service.
Unfortunately, many of the community-contributed adapters and modules have been deprecated or aren’t being actively maintained. So you’ll probably need to use an officially supported npm package and write custom code in order to ensure your code is secure by using the latest dependencies.
Server logs
If you use any console.log or console.error functions in your Cloud Code, they’ll be displayed in the Cloud Code > Logs dashboard, as pictured below.
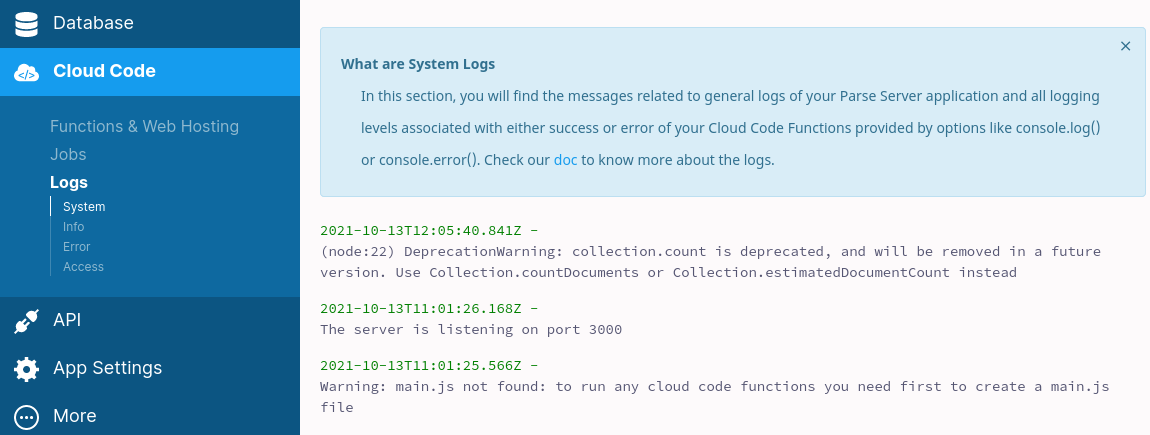
Logs can be viewed in the following categories:
- System
- Info
- Error
- Access
Event logging is an important aspect of running production apps, as it can help you understand requests and discover bugs in your code.
Analytics
Back4App provides Analytics reporting tools — which is a bonus feature, since the open-source Parse Server only supports capturing of data but not reporting. Back4App’s Analytics reporting tool helps in providing real-time information about your app such as growth, conversion, performance and usage behavior.
The tool comes with a set of pre-defined tracking reports which include:
- audience reports
- events reports
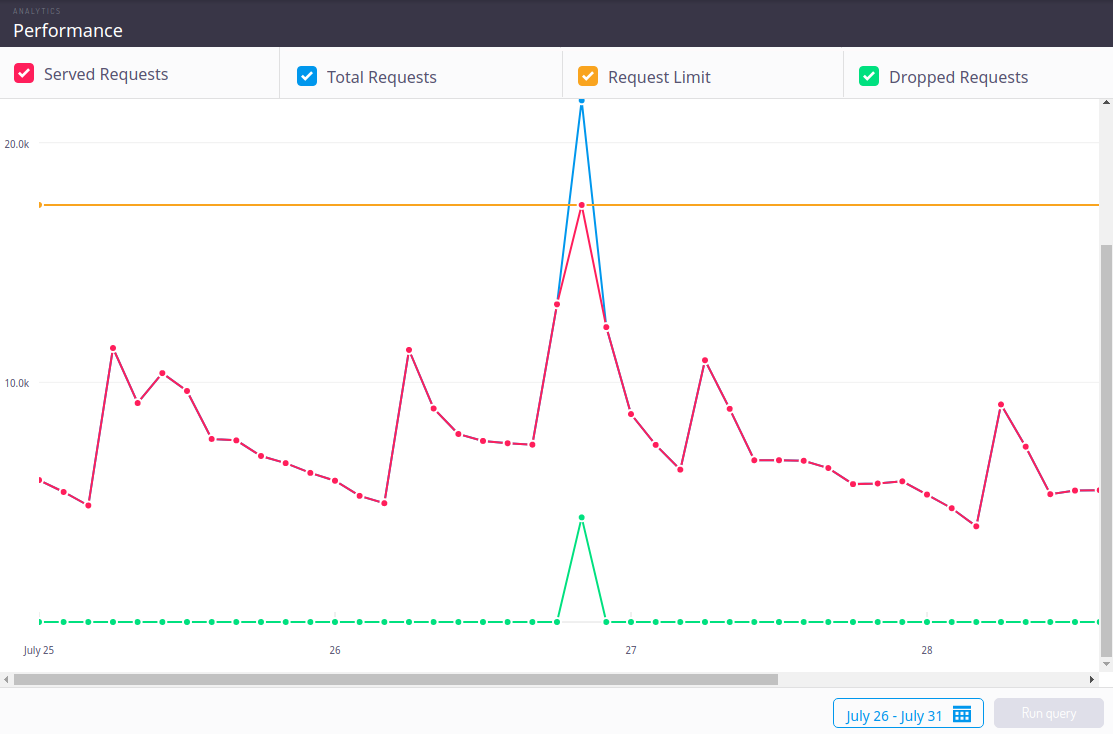
- performance reports
- slow requests report
The image below shows an example of a Performance report.
You can also define your own custom events report, which will allow you to track any event via the Parse SDK. See the following example code implemented on the client side via Parse SDK:
let dimensions = {
  // Define ranges to bucket data points into meaningful segments
  service: "haircut",
  professional: "John",
};
// Send the dimensions to Parse along with the event
Parse.Analytics.track("myEventName", dimensions);
The above code captures data and sends it to the Parse server. This data can later be queried and used to build a custom events report.
Front-end SDK Libraries
Parse supports every major front-end framework and language through its SDK libraries, including these:
- JavaScript
- Android, Flutter
- IOS: Objective C, Swift
- .NET
- PHP
- Unity
Unsupported programming languages can use the REST and GraphQL APIs to interact with data on a Parse Server. To use the Parse JavaScript SDK in a browser environment, you’ll need to install the following npm library:
npm install parse
Then import it like so:
const Parse = require("parse");
// ES6 Minimized
import Parse from "parse/dist/parse.min.js";
The library directly interacts with the Parse Server by providing developers with a set of functions that they can execute. These functions can handle operations such as:
- user sign ups, logins and session handling
- CRUD operations and advanced querying
- subscribing to real-time data using Live Queries
- file management: uploading, downloading, deletion etc.
- calculating GeoPoints
- receiving push notifications
- tracking custom analytics
Below are examples of CRUD operations using the Parse SDK in JavaScript:
//Initialize Parse
Parse.initialize("YOUR_APP_ID_HERE", "YOUR_JAVASCRIPT_KEY_HERE");
Parse.serverURL = "https://parseapi.back4app.com/";

// Saving new data object
async function saveNewPerson() {
  const person = new Parse.Object("Person");

  person.set("name", "John Snow");
  person.set("age", 27);
  try {
    console.log("New Person created with id:" + result.id);
  } catch (error) {
    console.log(error.message);
  }
}

// Querying a single data object
async function retrievePerson() {
  const query = new Parse.Query("Person");

  try {
    const person = await query.get("mhPFDl");
    const name = person.get("name");
    const age = person.get("age");

    console.log(`Name: ${name} age: ${age}`);
  } catch (error) {
    console.log(error.message);
  }
}
Summary
The majority of low-code and no-code platforms allow you to build specific solutions very quickly with no coding experience. Unfortunately, these platforms often lock you in and have limited capabilities. Parse and Back4App fortunately provides experienced developers with all the customization they need and the freedom to host with any cloud provider.
Some of additional features Back4App provides that haven’t been mentioned include:
- GDPR compliant plans
- automated backups
- 24/7 customer support
- content delivery networks
- scalable infrastructure
To conclude, I’ll leave you with this question. How would you prefer building your next back-end application?
- Option A: Using a Node.js framework like Express
- Option B: Using a BaaS platform like Back4App
Frequently Asked Questions (FAQs) about Parse Platform and Back4App
What is the Parse Platform and how does it work?
Parse Platform is an open-source framework that allows developers to build, host, and manage applications. It provides a backend solution for mobile, web, and IoT applications. It offers features like user authentication, data storage, push notifications, and social networking integration. Developers can use Parse SDKs to connect their applications to the Parse server, which handles all the backend operations.
How can I set up a Parse server?
Setting up a Parse server involves several steps. First, you need to install Node.js and MongoDB on your server. Then, you can install the Parse server module using npm (Node Package Manager). After that, you need to configure the Parse server by specifying the application ID, master key, database URI, and other options. Finally, you can start the Parse server using the Node.js command.
What is Back4App and how is it related to Parse Platform?
Back4App is a backend as a service (BaaS) platform that uses Parse Platform as its core technology. It provides a user-friendly interface for managing Parse servers and applications. It offers features like automatic scaling, real-time notifications, and multi-region deployment. Back4App is fully compatible with Parse SDKs, so developers can easily migrate their Parse applications to Back4App.
How can I migrate my Parse application to Back4App?
Migrating a Parse application to Back4App involves several steps. First, you need to create a new application on Back4App. Then, you can export your Parse application data and import it into Back4App. After that, you need to update your application code to use the Back4App server URL and application keys. Finally, you can test your application to ensure that it works correctly on Back4App.
What are the benefits of using Back4App over self-hosted Parse server?
Back4App offers several benefits over a self-hosted Parse server. It handles all the server management tasks, so developers can focus on building their applications. It provides automatic scaling, which ensures that applications can handle high traffic loads. It offers real-time notifications, which allow developers to monitor their applications in real time. It also provides multi-region deployment, which ensures that applications are always available and responsive.
How can I use Parse SDKs in my application?
Parse SDKs provide a set of APIs that allow developers to interact with the Parse server. They support various platforms and languages, including iOS, Android, JavaScript, PHP, and .NET. Developers can use Parse SDKs to perform operations like user authentication, data storage, push notifications, and social networking integration. They can also use Parse SDKs to customize the behavior of their applications.
What are the alternatives to Parse Platform and Back4App?
There are several alternatives to Parse Platform and Back4App, including Firebase, AWS Amplify, and Azure Mobile Apps. These platforms also provide backend services for mobile, web, and IoT applications. They offer features like user authentication, data storage, push notifications, and social networking integration. However, they have different pricing models and feature sets, so developers should choose the platform that best fits their needs.
How can I secure my Parse server?
Securing a Parse server involves several steps. First, you need to configure the server to use HTTPS, which encrypts the communication between the server and clients. Then, you can use the master key to perform sensitive operations, but you should keep it secret and use it sparingly. You can also use ACLs (Access Control Lists) to control who can access your data. Finally, you can monitor your server logs to detect any suspicious activity.
How can I scale my Parse server?
Scaling a Parse server involves several steps. First, you need to optimize your server configuration and code to handle more requests. Then, you can add more server instances to distribute the load. You can also use a load balancer to distribute the traffic among the server instances. Finally, you can use a database cluster to handle more data and queries.
How can I troubleshoot issues with my Parse server?
Troubleshooting a Parse server involves several steps. First, you need to check the server logs to find any error messages. Then, you can use the Parse Dashboard to inspect your data and operations. You can also use the Parse SDKs to debug your application code. Finally, you can consult the Parse community and documentation for help.
I write clean, readable and modular code. I love learning new technologies that bring efficiencies and increased productivity to my workflow.
