You may have heard of Sculpin – a static site generator for PHP. Static blogs are, as you may know, blogs which you dynamically write in your app or on your local machine, and then export as a pure HTML version for hosting on static-only servers, for speed, reliability, and offline-first friendliness.
While easy to use and fast to set up, Sculpin’s development has stagnated a bit and the documentation leaves much to be desired. Spress is, in a way, its spritual successor. Much better documentation, much more flexible configuration, much easier to extend, and just as easy to use with almost the same API and commands.
In this tutorial, we’ll be building an Spress setup for generating a static blog with a custom theme.
Bootstrapping
This tutorial will assume you have a working PHP environment like Homestead Improved. For convenience, the following few lines will get you started immediately:
git clone https://github.com/swader/homestead_improved hi_spress
cd hi_spress
bin/folderfix.sh
vagrant up; vagrant ssh
After we’re in the VM, we can install Spress with:
wget https://github.com/spress/Spress/releases/download/v2.0.0/spress.phar
sudo mv spress.phar /usr/local/bin/spress
sudo chmod +x /usr/local/bin/spress
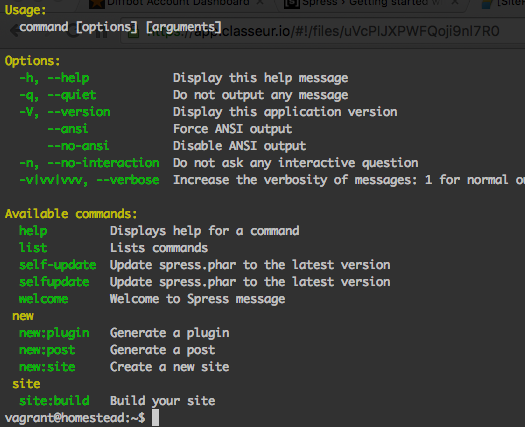
Spress is now available system-wide (or VM-wide if you’re using a VM), which can be verified by running spress:
To create a sample site, we can use the instructions from the docs:
cd ~/Code
spress site:new myblog spresso
cd myblog
spress site:build --server
The site should now be accessible via http://localhost:4000 or if you’re in a VM like Homestead Improved, you should first forward port 4000 in Homestead.yaml, run vagrant provision outside of the VM, and then access the site via http://homestead.app:4000:
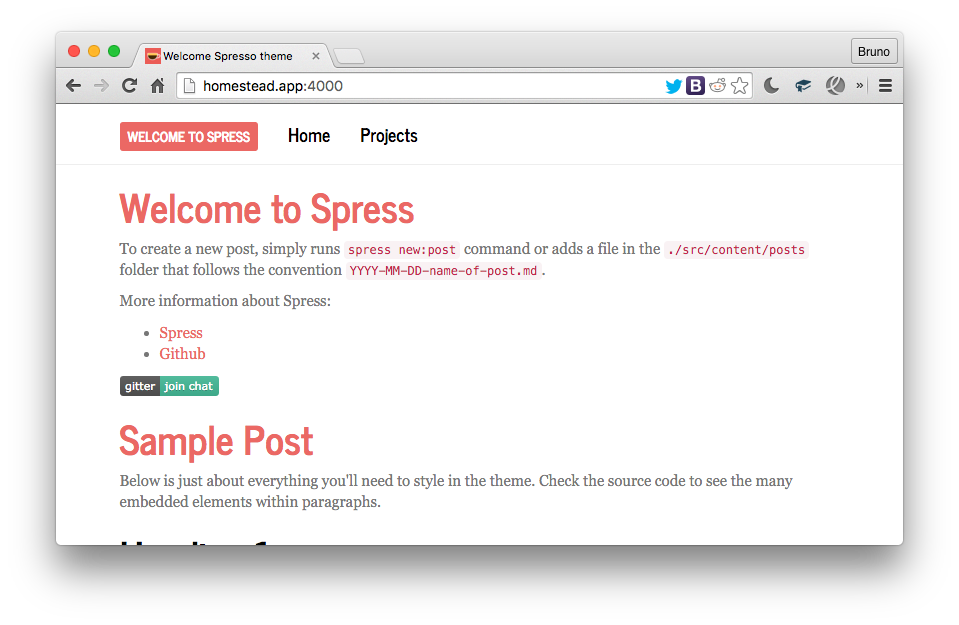
If you’re familiar with Sculpin, this setup will be almost muscle memory. Just like Sculpin, Spress also supports a --server option to start PHP’s built-in server, and the --watch option which watches files for changes and rebuilds the site as needed.
Custom Theme
We’ll rebuild the Svbtle theme to work with Spress.
For more general information about themes in Spress, see here.
How Themes in Spress Work
Every post or page you publish with Spress has “metadata frontmatter” – in other words, a bit of specifically formatted text before the content of the post or page. This frontmatter defines variables, settings, and, you guessed it, the layout (theme) to use. This is identical to how Sculpin works. For example, see the sample post “Welcome to Spress”:
---
layout: "post"
title: "Welcome to Spress"
categories: []
tags: ["sample post", "posts"]
---
To create a new post, simply runs `spress new:post` command or adds a file
in the `./src/content/posts` folder that follows the convention `YYYY-MM-DD-name-of-post.md`

....
The part between the separators (---) at the top is the frontmatter. In it, you can see (among other things) the value layout: "post". This literally means “find the content block in the layout file post.twig and put the content below inside it after you turn it into HTML”. If we now look at post.twig in /src/layouts, we’ll see the following:
---
layout: default
---
{% set isPostLayout = true %}

{% block content %}
    {% include 'post.html' with { 'post': page } %}
{% endblock %}

...
The content block is right there, ready to receive the converted MD content. Apart from the basic Twig syntax, we can see that this layout itself has some frontmatter as well. These are nested layouts in action: while our “Welcome to Spress” post extends post.twig, post.twig itself extends default.twig – the default layout which defines the CSS, JS, and other elements common to all pages / posts. Thus, we can see that the layout system of Spress is practically identical to regular Twig usage, with the sole difference that Spress uses frontmatter for defining inheritance.
Building a Theme
What building a theme comes down to, then, is just putting the right CSS / JS into the right locations and altering the Twig templates slightly.
First, let’s put some new CSS into the mix. Download this file into /src/assets/css. Then, grab a profile image or logo (if you don’t have one, use Adorable Avatars) and save it as src/assets/img/profile.png.
Anything you place in
src/assetsgets copied over into/assetsat build time.
Next, let’s add this CSS to our <head> section. In /src/includes/head.html, comment out or remove the lines that add bootstrap.min.css and style.css to the document, and add the svbtle.css sheet, so the section looks something like this:
<link href="//maxcdn.bootstrapcdn.com/font-awesome/4.2.0/css/font-awesome.min.css" rel="stylesheet">
<link href="{{ site.url }}/assets/css/svbtle.css" rel="stylesheet" type="text/css" />
Let’s now change the content of layout/default.html to:
<!DOCTYPE HTML>
<html lang="en">
<head>
    {% include 'head.html' %}
</head>
<body>
<div class="sidebar">
    <!-- Logo -->
    <div class="logo">
        <a href="/" title="{{ site.title }}">
            <span class="img"></span>
        </a>
        <a href="/" title="{{ site.title }}">
            <h1>{{ site.title }}</h1>
        </a>
    </div>
    <!-- Description -->
    <div class="description">
        Some blog posts by <a
            href="/about">me</a>.
    </div>
    <!-- Navigation -->
    <div class="navigation">
        <a href="{{ site.url }}/blog">Archive</a>
        {#<a href="{{ site.url }}/blog/categories">#}
            {#<nobr>Categories & tags</nobr>#}
        {#</a>#}
        <a href="{{ site.url }}/about">About</a>
    </div>
</div>

<div id="main" class="container spresso-wrap">
    {% block content %}
    {{ page.content }}
    {% endblock %}
</div>

    <script src="//ajax.googleapis.com/ajax/libs/jquery/2.0.3/jquery.min.js"></script>

    {% if site.code_highlight %}
    <script src="//cdnjs.cloudflare.com/ajax/libs/highlight.js/8.4/highlight.min.js"></script>
    <script>hljs.initHighlightingOnLoad();</script>
    {% endif %}

    {% block javascript %}{% endblock %}

</body>
</html>
The content of layout/post.html should become:
---
layout: default
---
{% set isPostLayout = true %}

{% block content %}
    <article class="post">
        <header>
            <div class="title"><a
                        href="{{ site.url }}{{ page.url }}">{{ page.title }}</a></div>
        </header>
        <div class="text">
            {{ page.content | raw }}
        </div>

    </article>
{% endblock %}

{% block javascript %}
    {% if (page.comments is defined and page.comments) or (page.comments is not defined and site.comments.enabled) %}
        <script type="text/javascript">
            var disqus_shortname = '{{ site.comments.disqus_shortname }}';

            (function() {
                var dsq = document.createElement('script'); dsq.type = 'text/javascript'; dsq.async = true;
                dsq.src = '//' + disqus_shortname + '.disqus.com/embed.js';
                (document.getElementsByTagName('head')[0] || document.getElementsByTagName('body')[0]).appendChild(dsq);
            })();
        </script>
    {% endif %}
{% endblock %}
And the content of src/content/index.html should now be:
---
layout: "page"
title: "Welcome Svbtle theme"

generator: "pagination"
provider: "site.posts"
max_page: 5
sort_by: "date"
---

{% for post in page.pagination.items %}

    <div class="date">
        <a href="{{ post.url }}">
            {{ post.date|date("d. F, Y") }}
        </a>

    </div>

    <article class="post">
        <header>
            <div class="title"><a
                        href="{{ site.url }}{{ post.url }}">{{ post.title }}</a></div>
        </header>
        <div class="text">

            {% if '<!--more-->' in post.content %}
                {{ post.content | split('<!--more-->') | first | raw }}
                <footer><a href='{{ site.url }}{{ post.url }}' class='continue'> Read more </a>
                </footer>
            {% else %}
                {{ post.content | raw }}
            {% endif %}

        </div>
    </article>

{% endfor %}


{% if page.pagination.previous_page or page.pagination.next_page %}
    <nav id="pagination">
        <div class="next">
            {% if page.pagination.previous_page %}<a
                href="{{ site.url }}{{ page.pagination.previous_page.url }}">Newer Posts</a>{% endif %}
        </div>
        <div class="prev">{% if page.pagination.next_page %}<a
                href="{{ site.url }}{{ page.pagination.next_page.url }}">Older Posts</a>{% endif %}
        </div>
    </nav>
{% endif %}
In addition to a theme change, we added nice little hack into the mix as well – while rendering content, Spress will look for the <!--more--> HTML comment in posts. If it encounters it, it will only render the content before it on the main page, and will summon a “Read more” button underneath. Clicking it, the reader is taken to the post’s full page and continues reading. Many thanks to @coderabbi for this hack.
Rebuild the site now with CTRL+C to stop the server and spress site:build --server to serve it, and we should see our newly made theme applied – it’s as simple as that!
Note: while building themes is relatively easy, installing them is a bit counterintuitive. To install a theme, one must effectively clone a new Spress site, and then paste the MD sources into it. This tends to be awkward due to different file structure used across themes but as you can see above, it usually doesn’t involve much work.
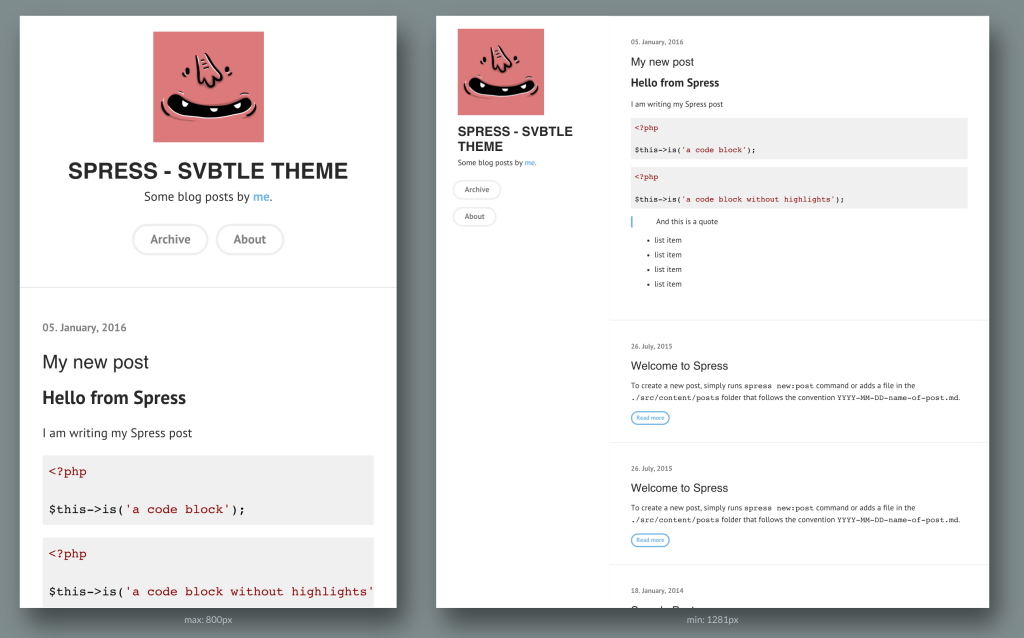
If we look at our site now and render it for different screen sizes, we should see it work just fine:
Conclusion
In this tutorial, we looked at Spress, a static site generator written in PHP with Symfony components, and generated a custom themed blog. In a followup post, we’ll look at more of its features – including taxonomies (categories and tags), custom pages, and deployment, and we’ll write a plugin or two.
Do you use a static or a dynamic blog? Why? Have you tried Spress or are you still on Jekyll, Sculpin, or a similar tool? Let us know!
Bruno is a blockchain developer and technical educator at the Web3 Foundation, the foundation that's building the next generation of the free people's internet. He runs two newsletters you should subscribe to if you're interested in Web3.0: Dot Leap covers ecosystem and tech development of Web3, and NFT Review covers the evolution of the non-fungible token (digital collectibles) ecosystem inside this emerging new web. His current passion project is RMRK.app, the most advanced NFT system in the world, which allows NFTs to own other NFTs, NFTs to react to emotion, NFTs to be governed democratically, and NFTs to be multiple things at once.

