Setting Up a Python Programming Environment
PART I
Getting Started with Python
- Lesson 1: Setting Up a Python Programming Environment
- Lesson 2: Understanding Programming Basics
- Lesson 3: Exploring Basic Python Syntax
- Lesson 4: Working with Basic Python Data Types
- Lesson 5: Using Python Control Statements
- Lesson 6: Pulling It All Together: Income Tax Calculator
As mentioned in the introduction, this book is designed to give you a thorough understanding of the Python programming language and its rich set of libraries, and to expose you to application development using Python. In order to do this, you'll need a tool to enter and run your Python programs. In this first lesson, we point to tools and show you how to get started using them.
LEARNING OBJECTIVES
By the end of this lesson, you will:
- Know of a few Python tools that are available.
- Learn where you can access an online Python tool to enter and run Python scripts.
- Create and run your first Python script.
Note
Don't worry if you don't understand some of the jargon and code presented in this lesson. Rather, focus on setting up your programming environment as described in this lesson. The rest of this book will focus on teaching you the jargon and code!
PYTHON OVERVIEW
Python is a general-purpose programming language that is interpreted. Python balances ease and comprehension with power and speed. With its focus on speed for developing applications, it has become a significant tool for software development. When working with Python, you write programs that are then executed using Python. The programs are generally saved as text files with a .py extension and interpreted using the Python program.
Because Python is open source, there are several development environments and distributions that can be used to write Python programs. To program Python you need either a text editor or an integrated development environment (IDE) as well as a Python interpreter. In many cases, if you install an IDE, it will install Python for you as well. You can also install the Python interpreter on your system and use any text editor you want.
In this lesson, we will cover installing Python and some publicly available tools. Before showing how to install Python locally, we'll introduce Replit, which is an integrated development environment you can use online without installing anything locally. It is relatively easy to use and includes everything you need to get started learning Python. We'll also show you how to install two other development environments, Anaconda Jupyter Notebook and Microsoft Visual Studio Code, which are also free. Finally, we'll show you how to install Python on its own to use via the command line of your operating system.
Note
We show several tools in this lesson; however, you don't need to use all of them. The objective is to show you several tools and let you decide which one to use. If you are unsure which to use, we recommend starting with Replit.
USING REPLIT ONLINE
Replit is a popular online IDE used to learn many programming languages including Python. By using Replit, you can enter your Python code and run it without installing anything locally on your machine. This means you can start programming Python immediately and will be able to access your programs and the tools from any computer with internet access.
Note
Replit was originally called Repl.it, but changed its name around 2021. It also changed its URL from Repl.it to Replit.com at the same time.
Creating a Replit Account
You can find Replit at www.Replit.com. When you land on this page, you should be greeted with a page similar to Figure 1.1.
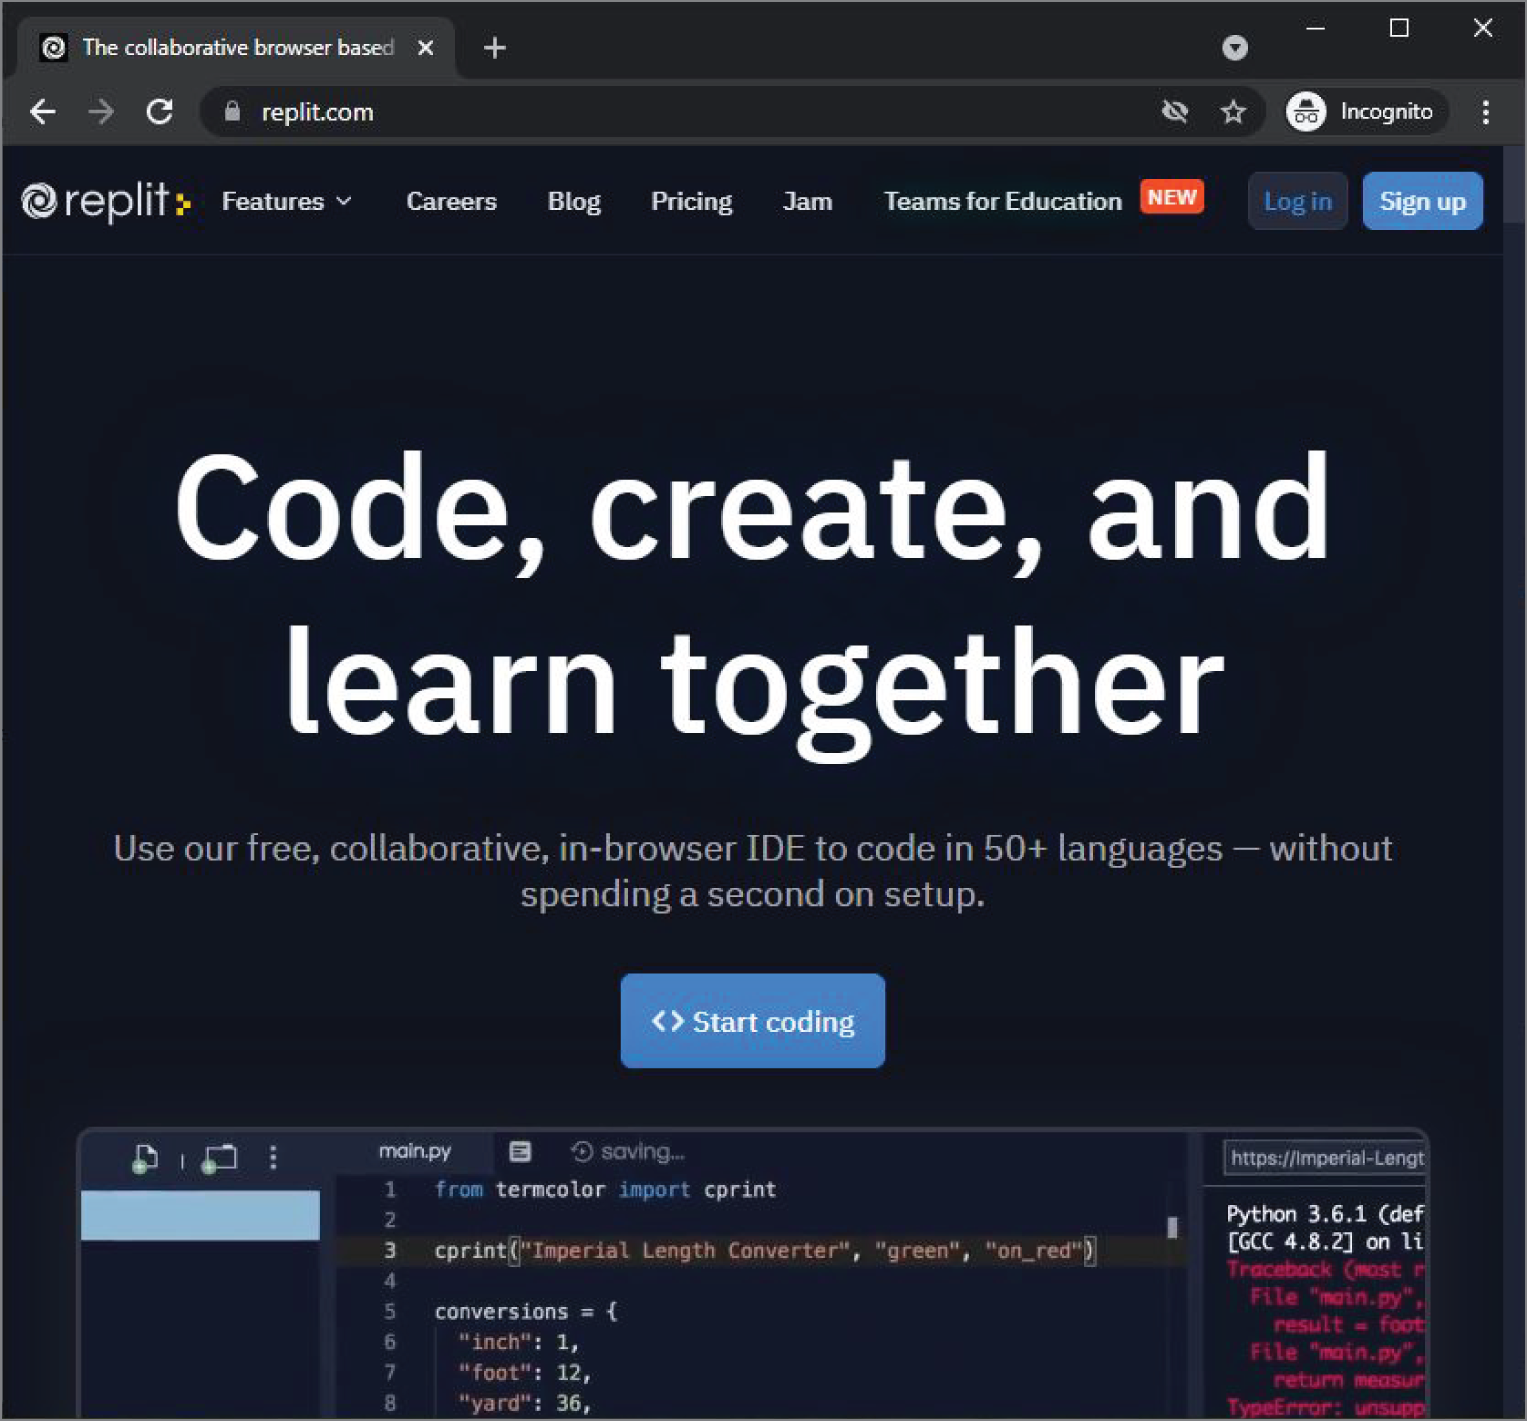
Figure 1.1 The Replit.com home page
You will notice a button in the middle of the page labeled < > Start coding. Clicking this button will take you to a dialog asking you to log in. This is similar to clicking the Log in button on the top-right corner of the page. Before you can start coding with Replit, you need to sign up for an account. Thankfully, Replit offers a free account that should provide you with everything you need to complete this book. Clicking either button will present a dialog similar to Figure 1.2.
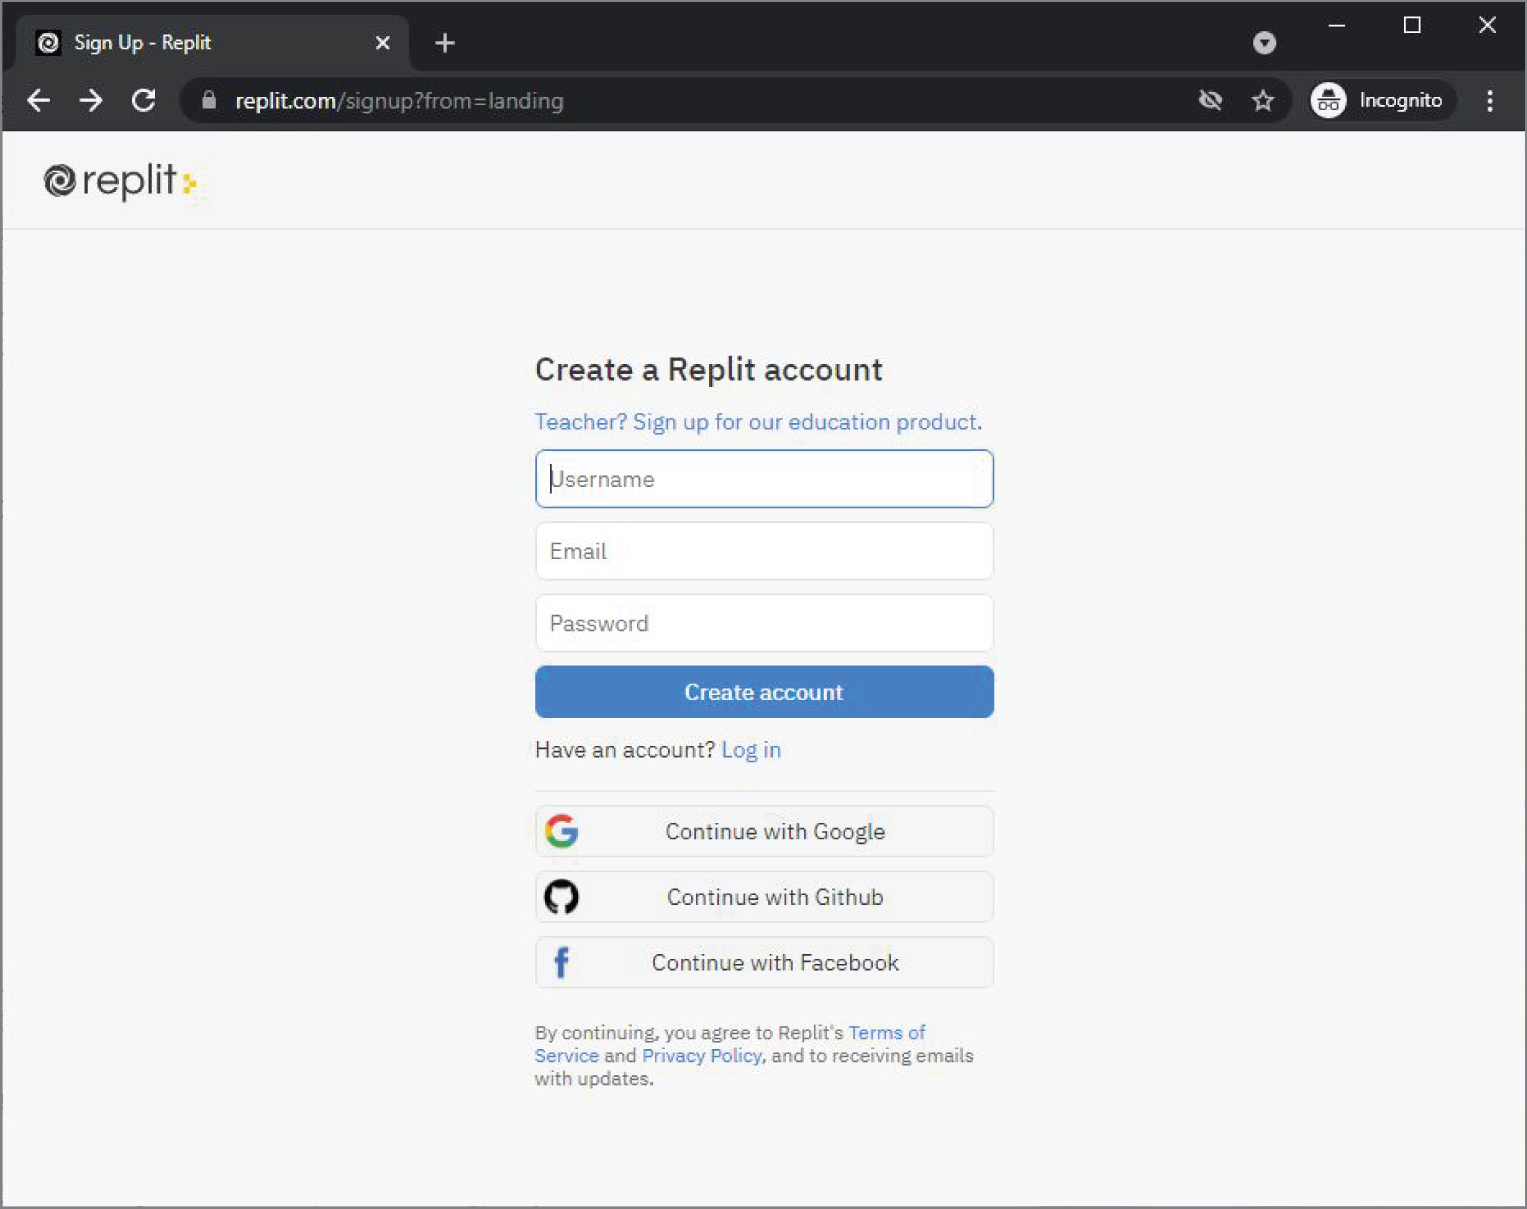
Figure 1.2 The Sign-up dialog for Replit
If you plan to use Replit, you should create an account by entering a username that is between 2 and 15 characters, a valid email address to use to verify the account, and a password. Enter the information and click the Create account button. Alternatively, you can log in using a Google, GitHub, or Facebook ID.
If you've entered acceptable information for your account, then the sign-up process should take you to the Replit desktop with a welcome dialog similar to Figure 1.3.
Note
You might see a slightly different flow for initially setting up Replit. You might be prompted with a survey that contains questions related to what you plan to do with Replit. Replit will to customize the IDE based on your answers to these questions.
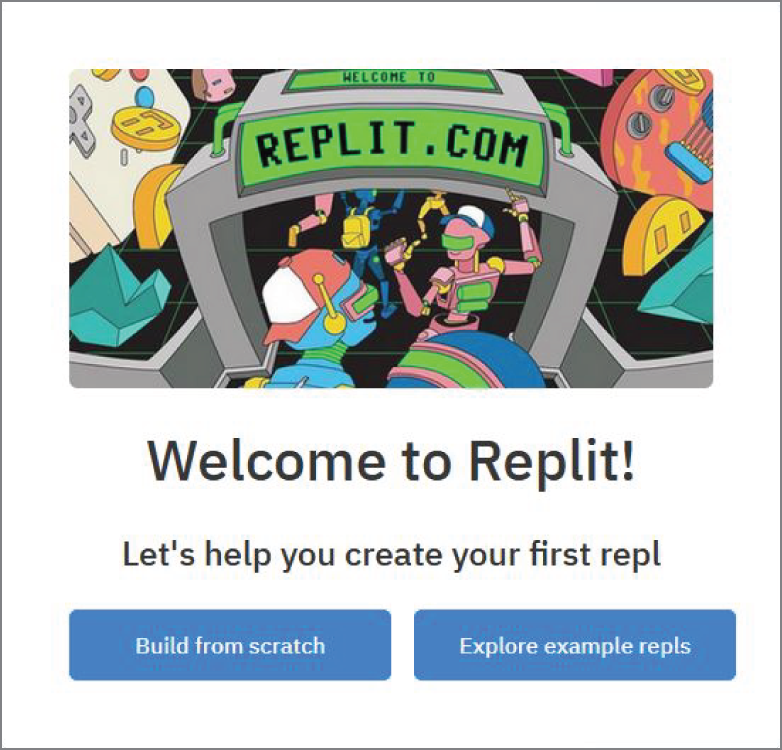
Figure 1.3 The Replit welcome dialog
Creating a Python Program in Replit
In the welcome dialog, you are offered the options to build from scratch or to explore example repls. Select Build from scratch to continue. This should greet you with a dialog to build your first repl as shown in Figure 1.4, which is simply a program area within the Replit IDE.
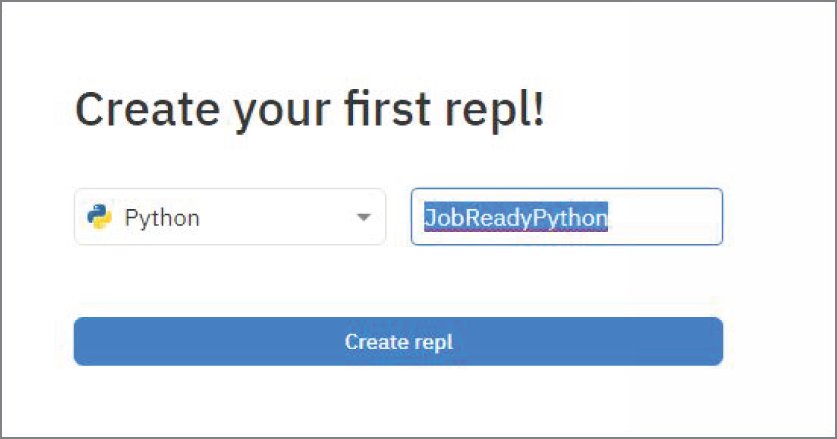
Figure 1.4 Building a new program from scratch
You should select Python from the drop-down menu and enter a name for your repl in the second box. In Figure 1.4, we entered JobReadyPython. You can do the same. With the language selected and name provided, click Create repl to continue.
Your first repl work area will be created and you'll be dropped into the Replit desktop. More importantly, because you selected Python, the desktop will be preconfigured to allow you to write Python code. The desktop is shown in Figure 1.5.
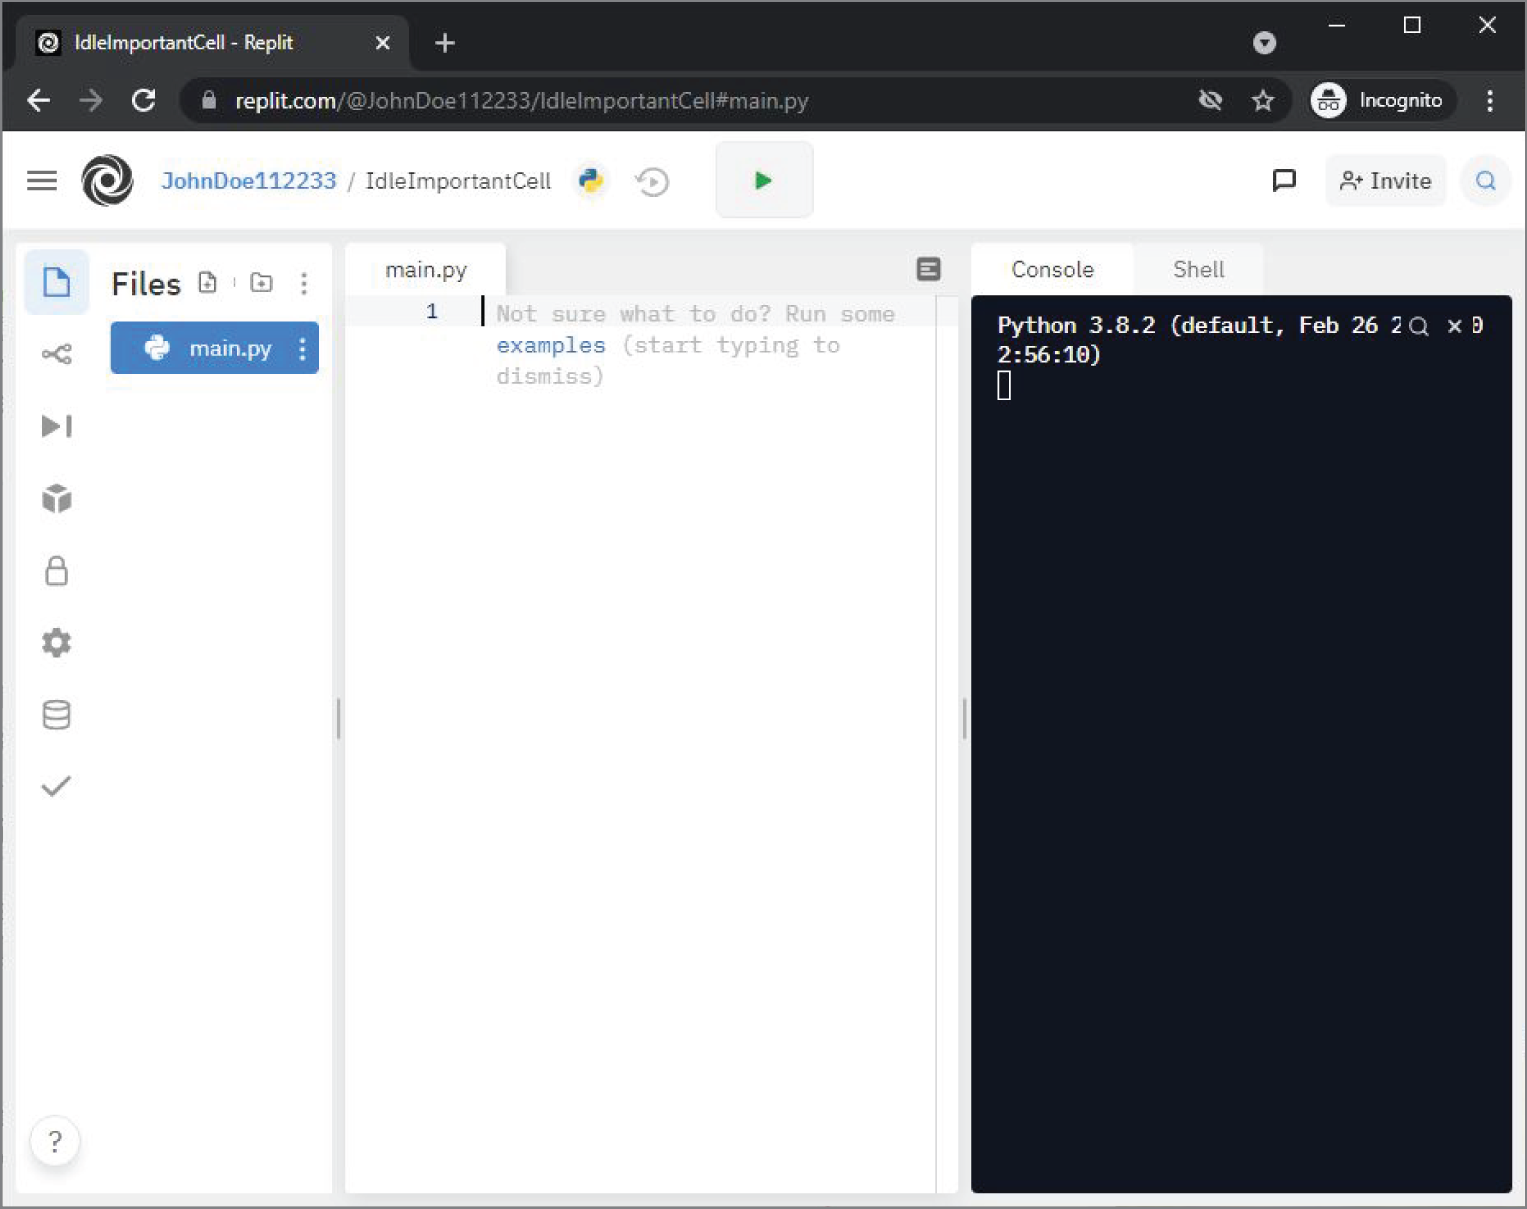
Figure 1.5 Replit desktop with Python ready to go
If you look at the Replit desktop, you will see that it is presented in three sections. The far left is the Files dialog and icons for project options. You can see in Figure 1.5 that your Python project was started with one file by default called main.py.
The middle section has a tab that shows the editor where you will write your Python code. Currently the tab shown has the main.py file displayed. If you click to the right of the number 1, you will be able to enter code. Note that the editor shows some text there; however, it is not part of your file and as soon as you type something, it will go away. You can click that text if you want to see some examples.
The right side of the desktop shows the Console window. The Console window is where the output from running your program will be displayed. Using the IDE, you will write programs in the middle section, then click the run button (![]() ) at the top of the screen. The results (or errors) will then be displayed in the right dialog area.
) at the top of the screen. The results (or errors) will then be displayed in the right dialog area.
To see this in action, enter Listing 1.1 into the main.py file in the middle dialog on the IDE. This is basic Python code used to print statements. You will need to make sure you use the same capitalization and spacing.
LISTING 1.1 Using the Replit editor
print("This is my first Python program!")print("It is beautiful!")When you enter this, you will notice that the Replit editor will provide you helpful information as shown in Figure 1.6. This is one of the benefits of using an IDE.
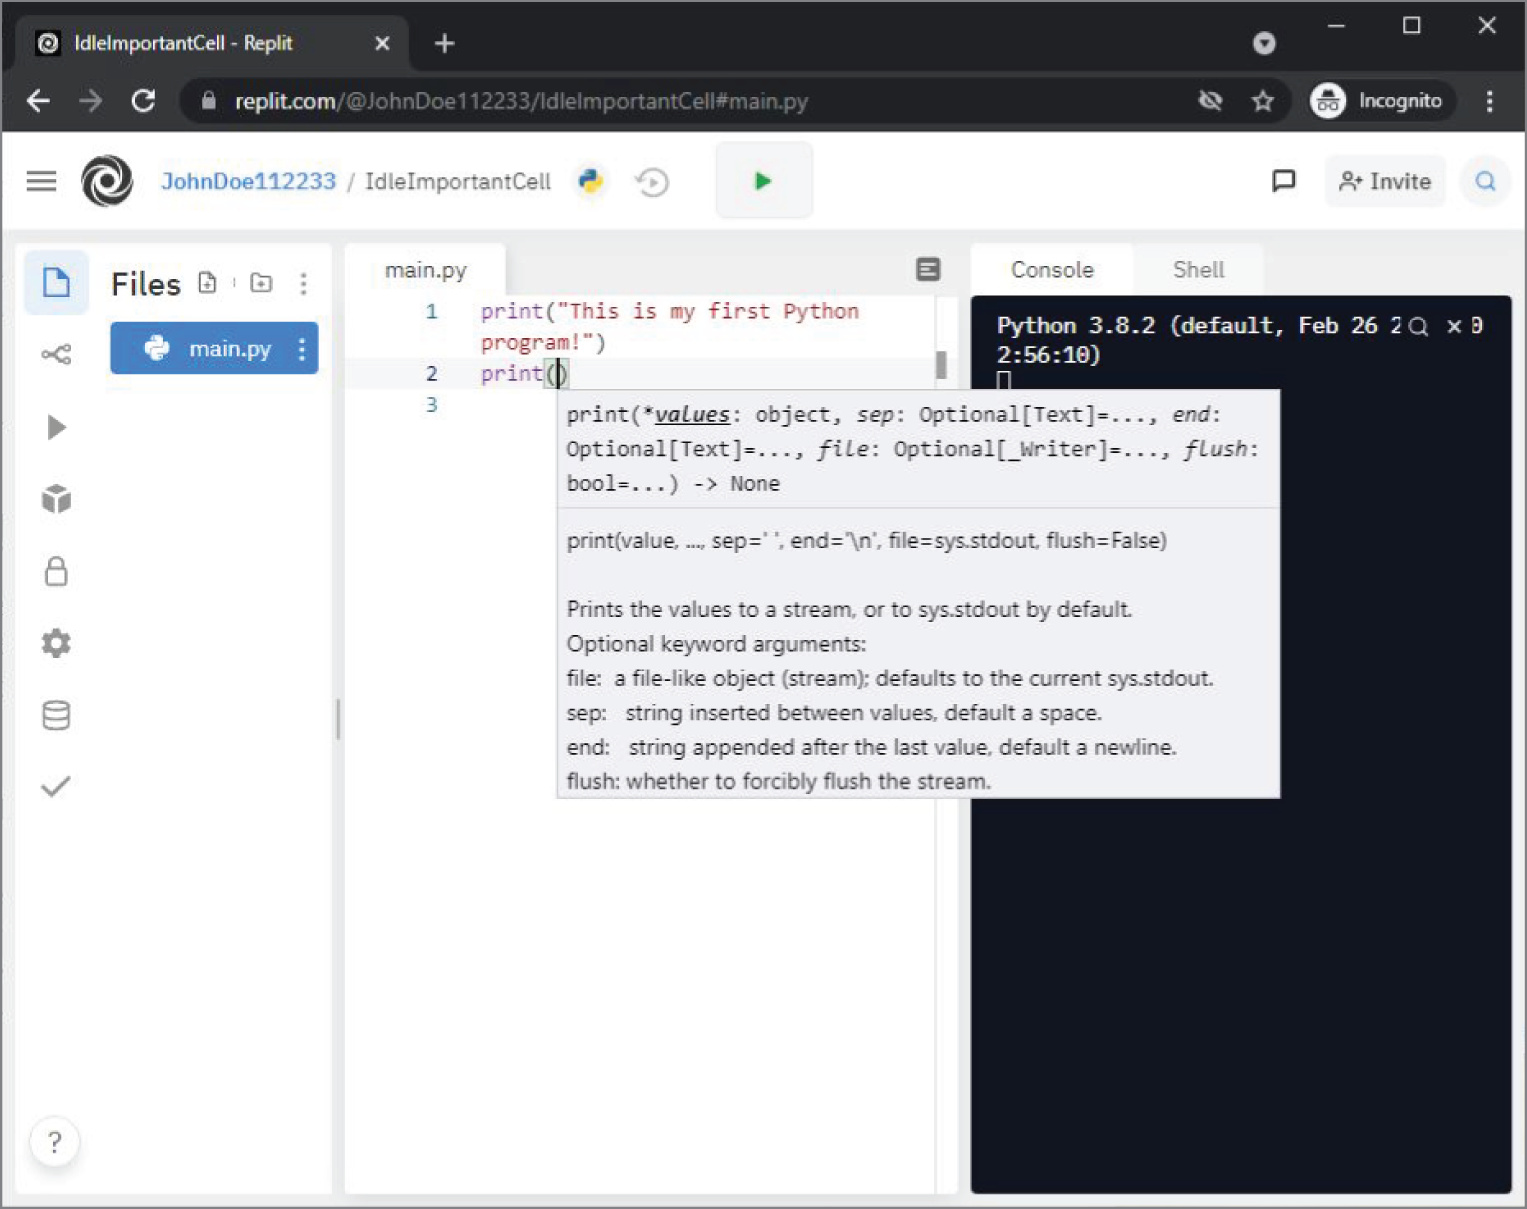
Figure 1.6 Entering code into Replit
Running a Python Program in Replit
Once you've entered the code from Listing 1.1, click the run button ( ) at the top. The
 print function you are using displays text to the console, so you will see the text that was within the quotes displayed on the right side of the IDE as shown in Figure 1.7.
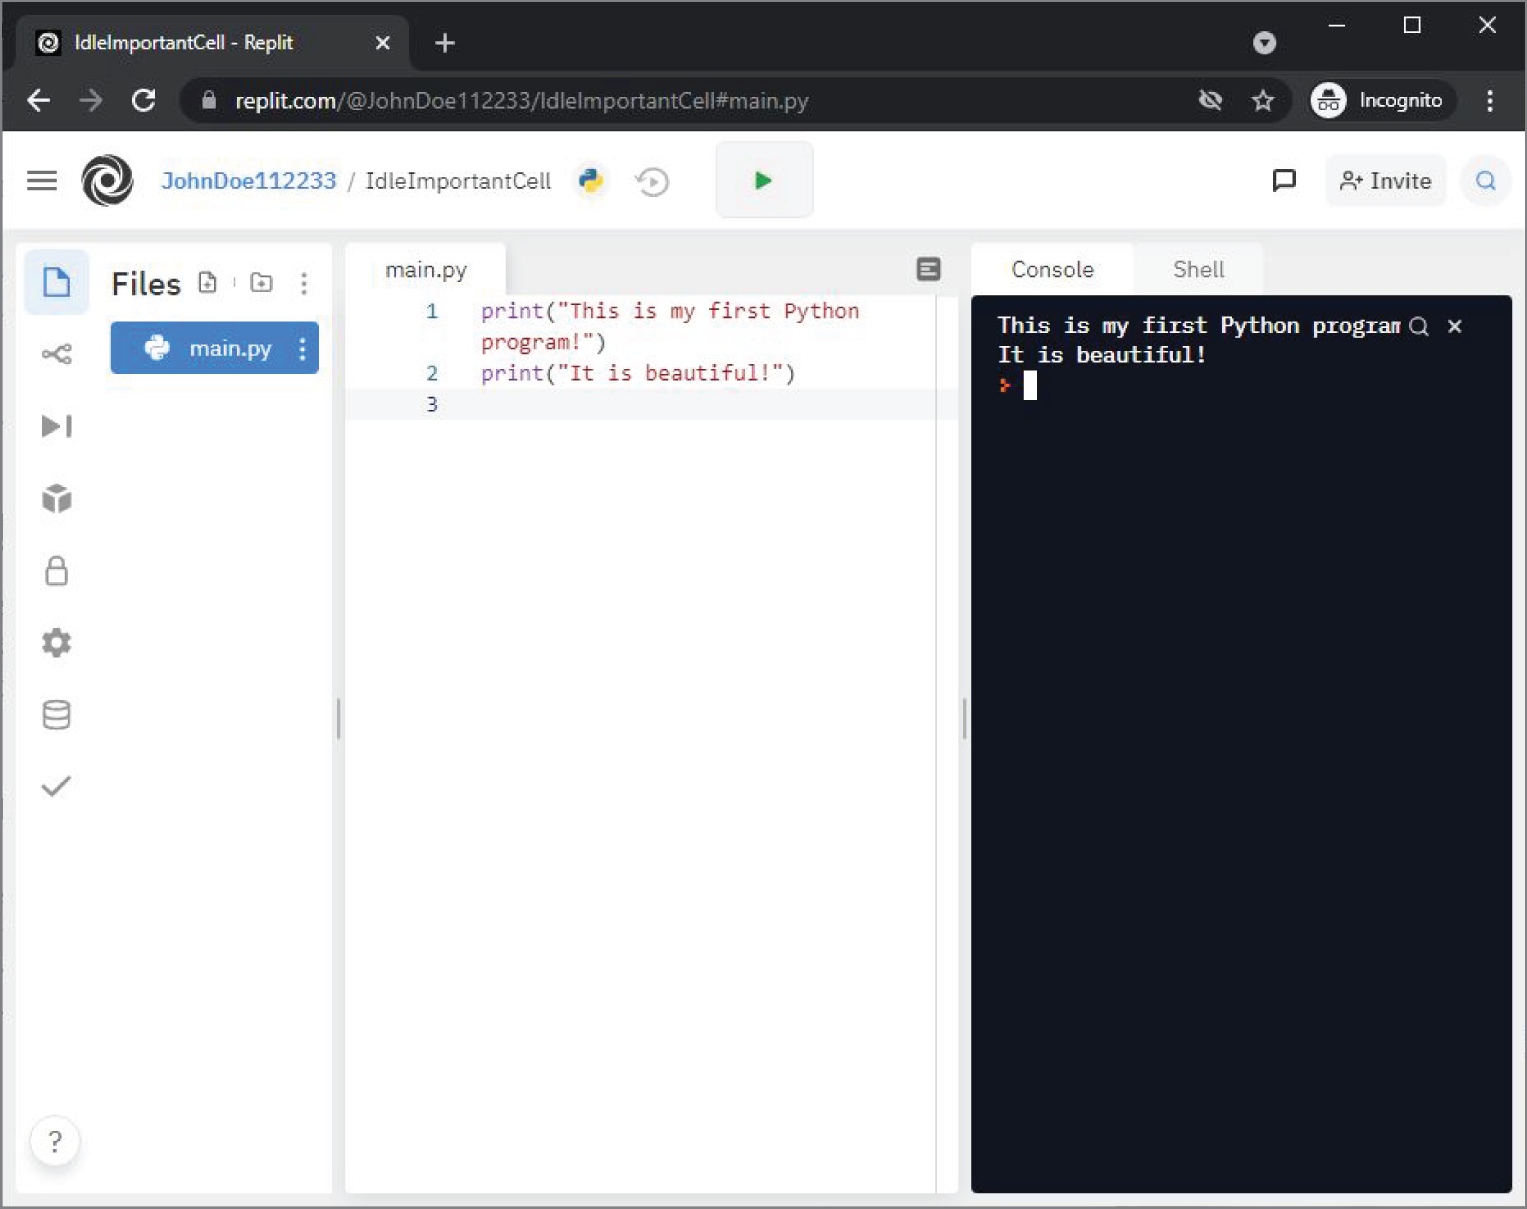
Figure 1.7 Running the Python script in Replit
Congratulations! You've entered and executed your first Python program. If you type something wrong, then you might get an error when you run the program. If so, that error will be shown in the Console window instead of the expected results. You can read what the error states and possibly determine what was done wrong.
Note
When an IDE shows an error, it might include a line number. The line number shown might not be the line that had the issue, but often will be close. If you leave off the closing parenthesis on the second line of code, the error you receive will likely indicate line 3 because the interpreter didn't know the parenthesis was missing until it got to line 3.
Other Replit Tasks
It is beyond the scope of this book to teach you everything about Replit; however, the following sections present a few core tasks you will find useful as you work through the code within this book using the Replit IDE. These include:
- Renaming your code file
- Saving your code file
- Adding additional files to a Python project
- Getting more help for Replit
Renaming Your Code File
The default name for the Python file was main.py. You can change this name to any name you'd like, but you should leave the extension as .py to indicate it is a Python program.
To rename the source code file, click the three dots to the right of the file name in the Files dialog on the left side of the IDE. This will display a menu as shown in Figure 1.8.
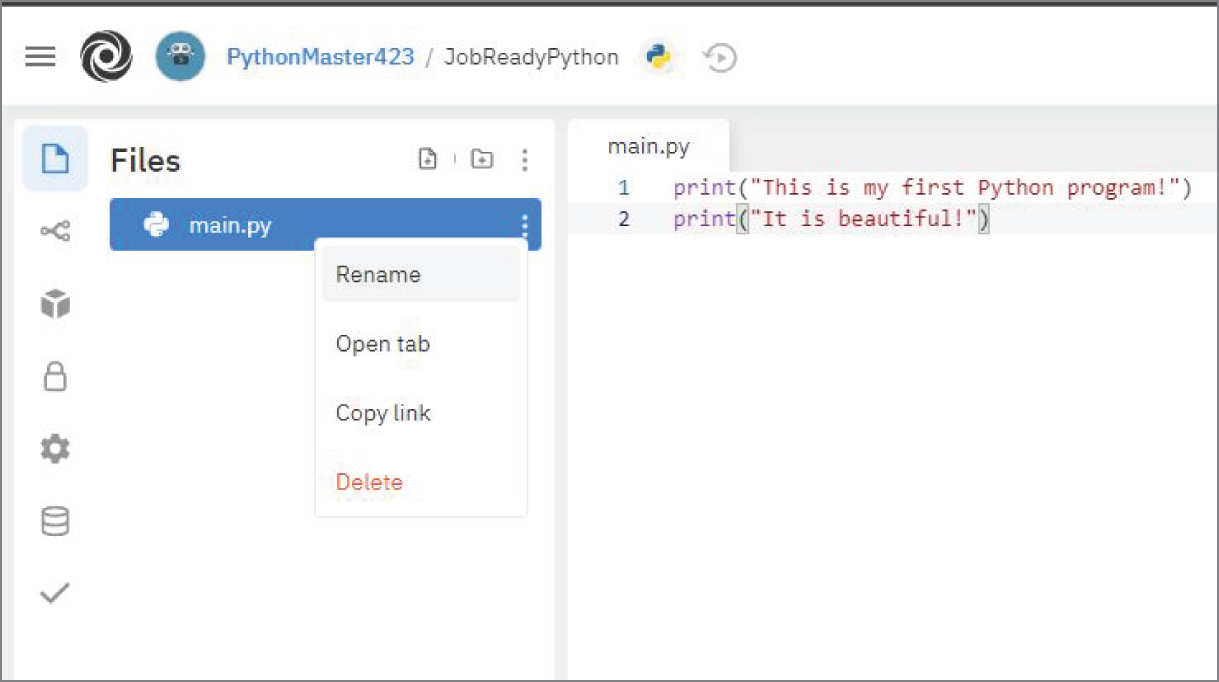
Figure 1.8 Files menu in Replit
You can click Rename, which will then allow you to rename the file directly in the Files dialog. You'll notice that this menu also gives you the ability to delete the file as well.
If you rename your main.py file, you'll find that Replit will no longer run the program. By default, Replit runs the file called main.py, so if you rename it, Replit will give an error in the console when you use the Run button.
You can get around this issue by running the program in the Shell tab in the right pane of the IDE. Using the Shell is like running a program from an operating system command line. To run a Python script from the command line, you type python followed by the filename with its extension. To run the script in MyFirstProgram.py, you would enter the following in the Shell:
python MyFirstProgram.pyBecause MyFirstProgram.py is the renamed main.py we created earlier, it will display the same output. Figure 1.9 shows the Replit Shell with the command entered and the resulting output.
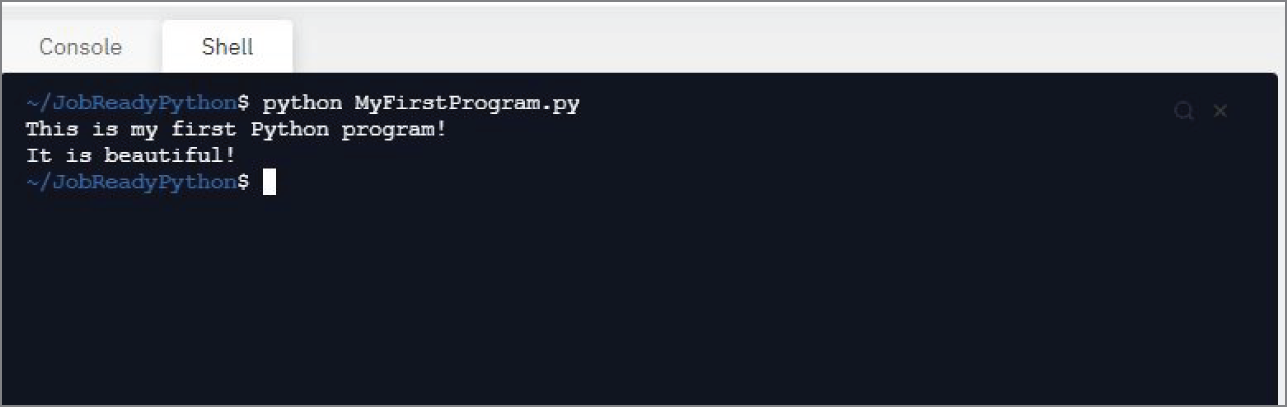
Figure 1.9 Running Python in the Replit Shell
Note
The Shell is case sensitive, so you need to type python in all lowercase and the filename case must match what you used to save the file.
Saving Your Coding File Locally
If you'd like to save a copy of your source code to your local machine, you can either copy and paste from the online IDE, or you can download everything in your project in a compressed zip file.
To download the project, click the three dots to the right of the word Files at the top of the Files dialog. This will provide a menu similar to Figure 1.10 that will allow you to download your code. Once downloaded, you can uncompress the zip file to get to your individual files.
Creating a New File for Your Python Project
As you work through the lessons in this book, your projects will become more complex. Many lessons will have you enter and run one listing at a time, but as you build more advanced programs, you will need to create additional files to hold your scripts. Replit will let you create multiple files.
You can create an additional file by clicking the Add file icon (![]() ) in the Files dialog. This will prompt you for the name of the new file as shown in Figure 1.11. You can enter the new filename into the open box and press Enter to create it.
) in the Files dialog. This will prompt you for the name of the new file as shown in Figure 1.11. You can enter the new filename into the open box and press Enter to create it.
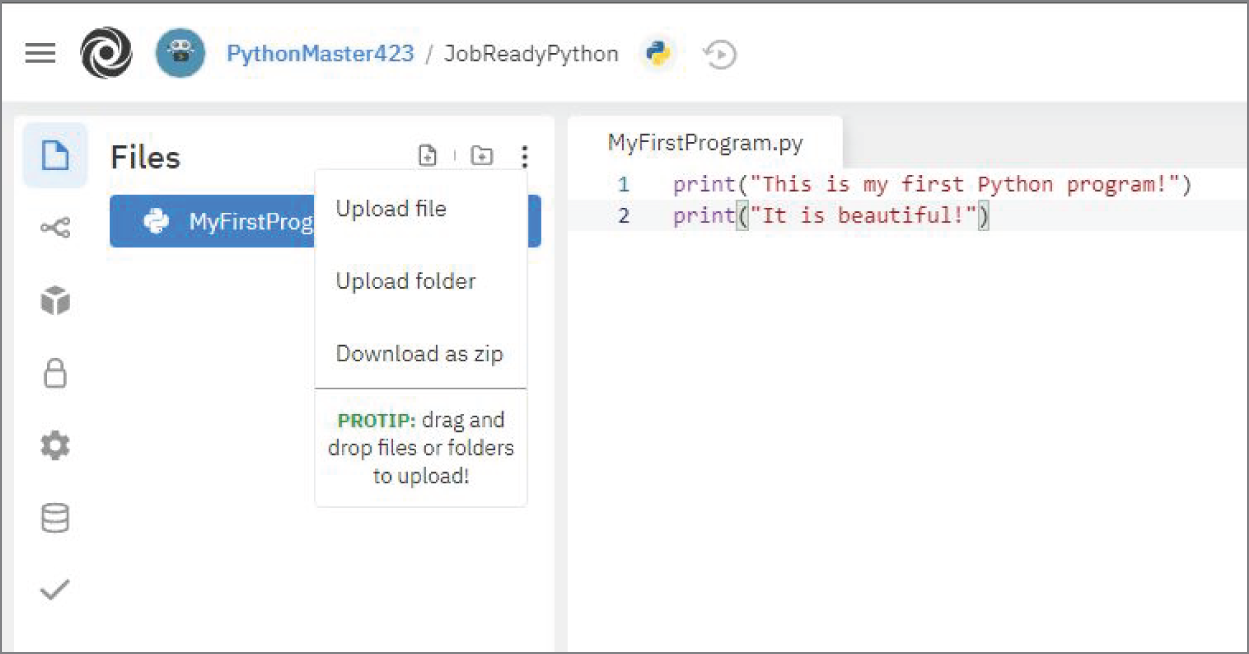
Figure 1.10 Downloading a project from Replit
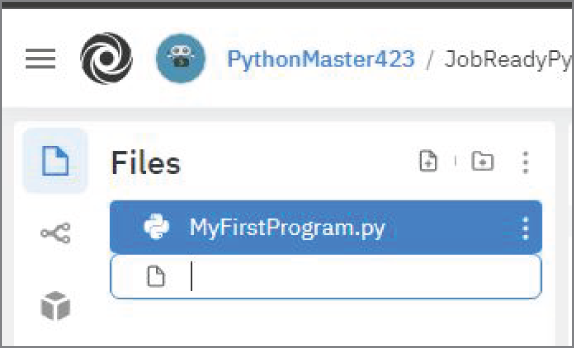
Figure 1.11 Creating a new file
Adding Files to Your Python Project
In addition to creating new files, you can also upload files to your project. These files might be database files, images, text files, or additional source files. You can do this by clicking the three dots to the right of the word Files at the top of the Files dialog to bring up the menu you saw in Figure 1.10. From the displayed menu, you can upload a file or a folder into your project. Clicking the menu option will bring up the file dialog for your operating system and let you select the file you want to include.
Returning to Replit
The scripts you create in Replit will remain online at Replit.com. If you leave Replit.com or if you load Replit.com from a different site or browser, you might not return to the workspace you've seen earlier, but rather you might land on a page similar to Figure 1.12. If so, you can click the My repls option on the left menu to find your project. Once your project is displayed, you can select it to return to the IDE you saw earlier in this lesson.

Figure 1.12 Returning to Replit
Getting More Help for Replit
As mentioned earlier, it is beyond the scope of this book to teach you everything that Replit can do. That could be an entire book of its own. At this point, you know enough to enter the code from the lessons in this book and run them. If you want to learn more about Replit, you can click the menu and select either the Tutorials option or Get Help. Both will provide links to additional sources of information.
GETTING STARTED WITH JUPYTER NOTEBOOK
Jupyter Notebook is another development environment that can be used to write Python programs. The following section covers installing the Anaconda Distribution, which is an open-source IDE that includes Python 3 and several libraries. The key difference between Anaconda and Replit is that you can install Anaconda on your local machine instead of using it online.
To install the Anaconda Distribution, start at the Anaconda downloads page for the Individual Edition at https://www.anaconda.com/products/individual. On this page, you can click the Download button to download the latest version of the installation package for your computer. There are downloadable versions for Windows, macOS, and Linux.
Installing Anaconda Jupyter Notebook
When the download is complete, open the file and follow the instructions to install Anaconda using the default settings. Once the software is installed, you will need to choose a development environment that allows Python programs to be written. One of the most popular development environments is Jupyter Notebook, which is installed as part of the Anaconda Distribution.
After you have installed the Anaconda Distribution, you will be able to open Jupyter Notebook from the Windows Start menu, as shown in Figure 1.13.
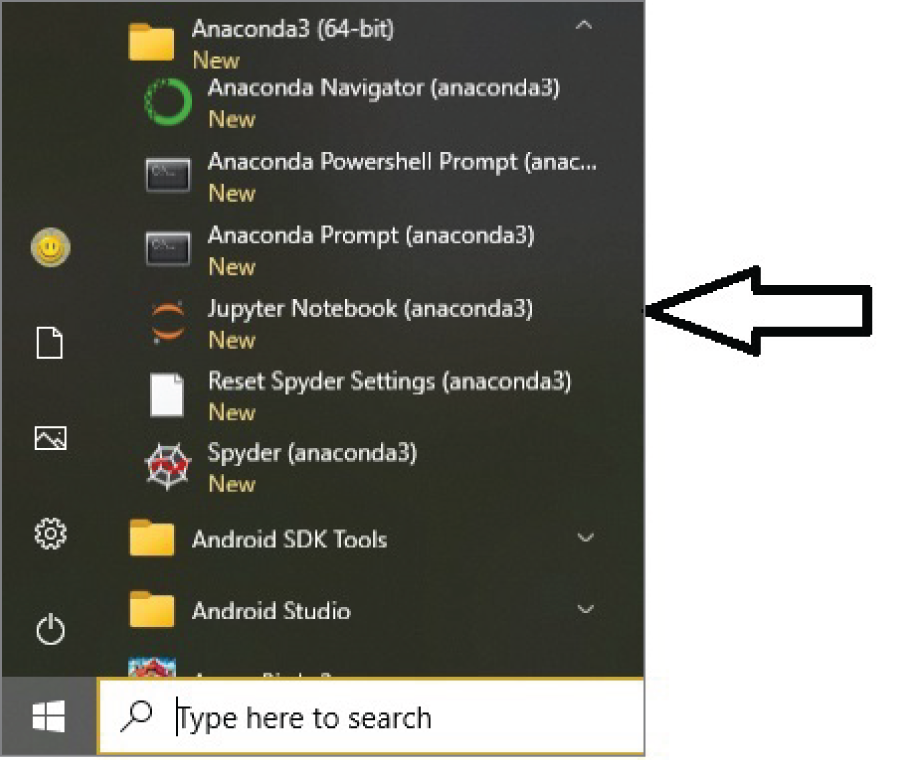
Figure 1.13 Jupyter Notebook
Note
If you are using a Mac, open the Anaconda Navigator app and launch Jupyter Notebook from there.
When you open Jupyter Notebook, a script will run in a command window and the user interface will open in a browser window. You should leave the command window open while you work, but you can minimize it if it is in your way. If you close the command window, you will have to restart Jupyter Notebook to continue working.
The user interface opens in your default browser, and you will see a list of folders stored on your computer similar to Figure 1.14.
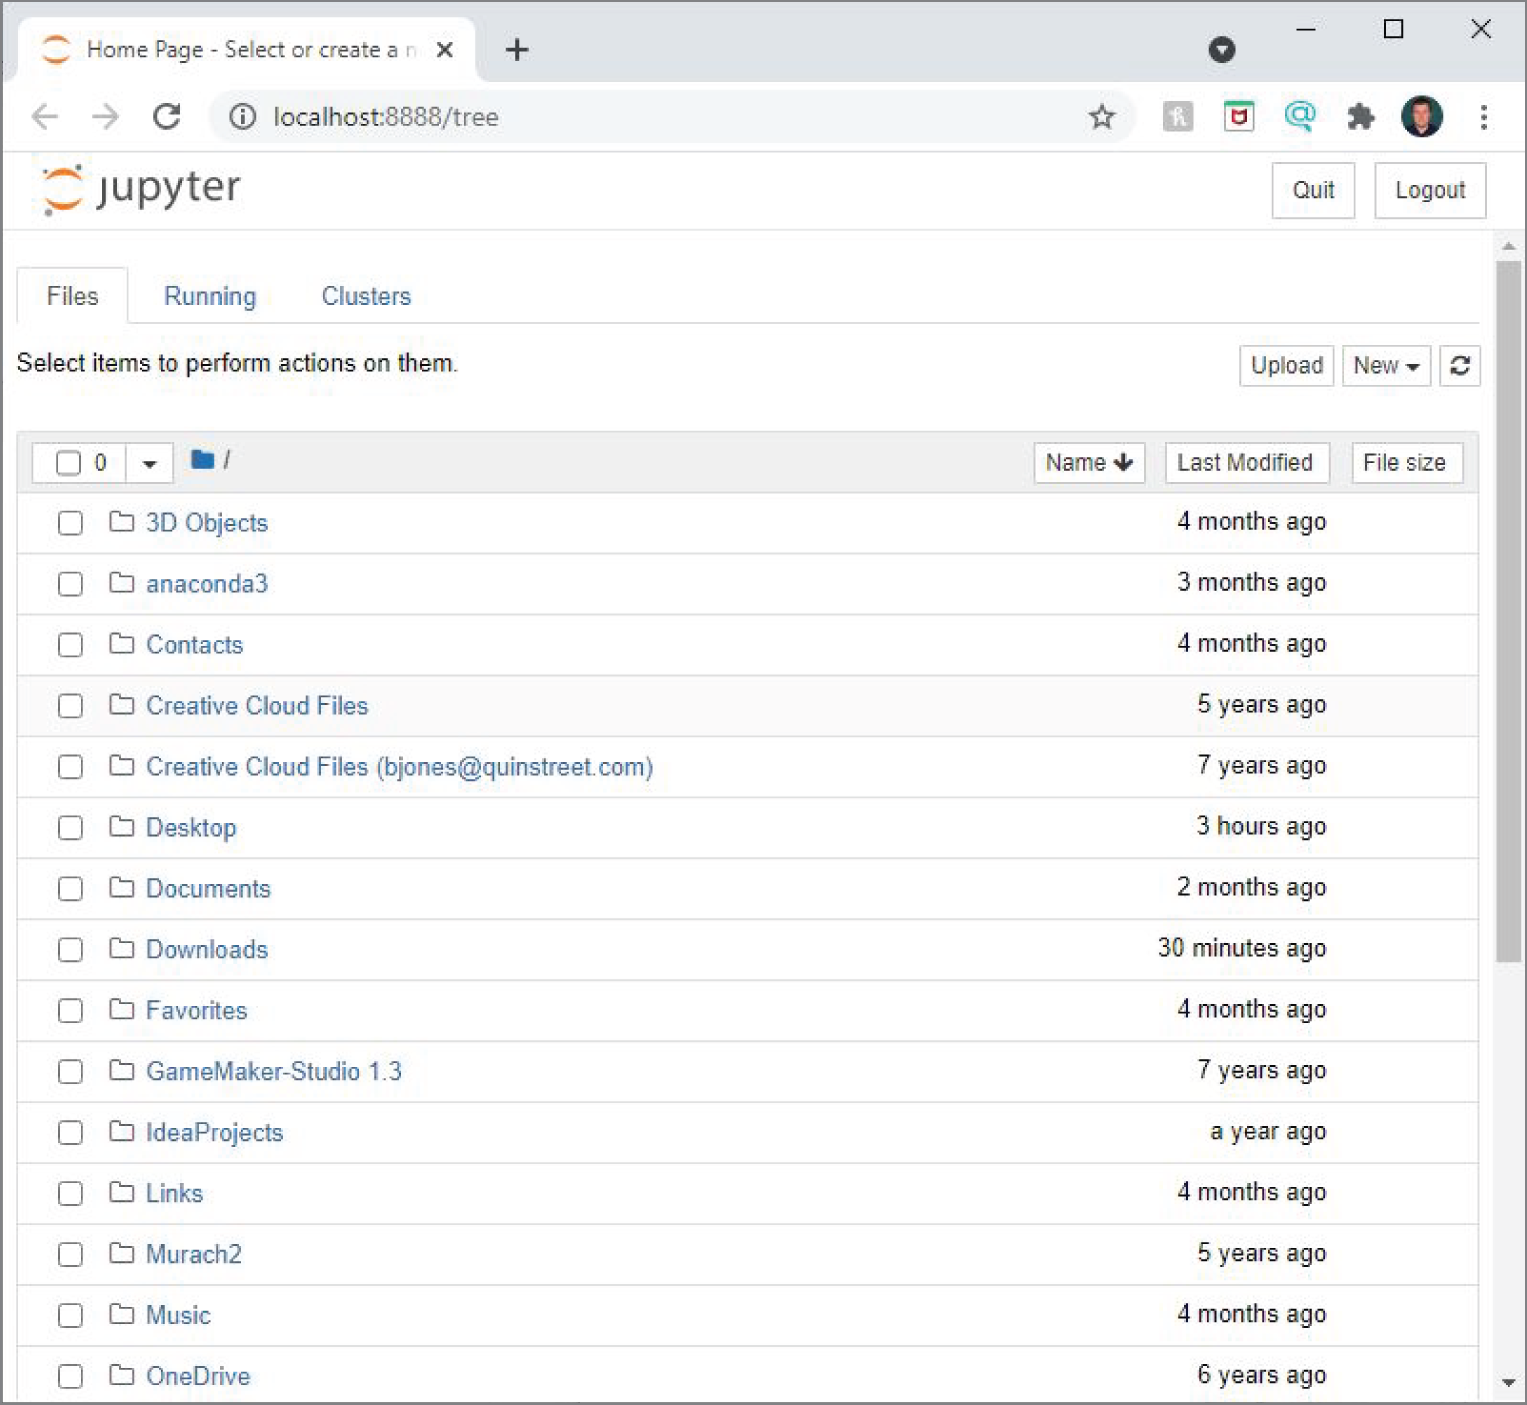
Figure 1.14 The Jupyter Notebook interface
Creating a New Jupyter Notebook File
To create a Python file in Jupyter Notebook, you will need to navigate to the location where you want to create it first. Once there, you can create and run a Python script.
Start by opening the folder where you want to save the new file in the Jupyter Notebook. You can click and navigate to the folders displayed in the browser interface you saw in Figure 1.14. For example, we clicked the Documents folder to navigate into it. You can also create new folders by clicking the New drop-down option on the upper-right area of the interface as shown in Figure 1.15.
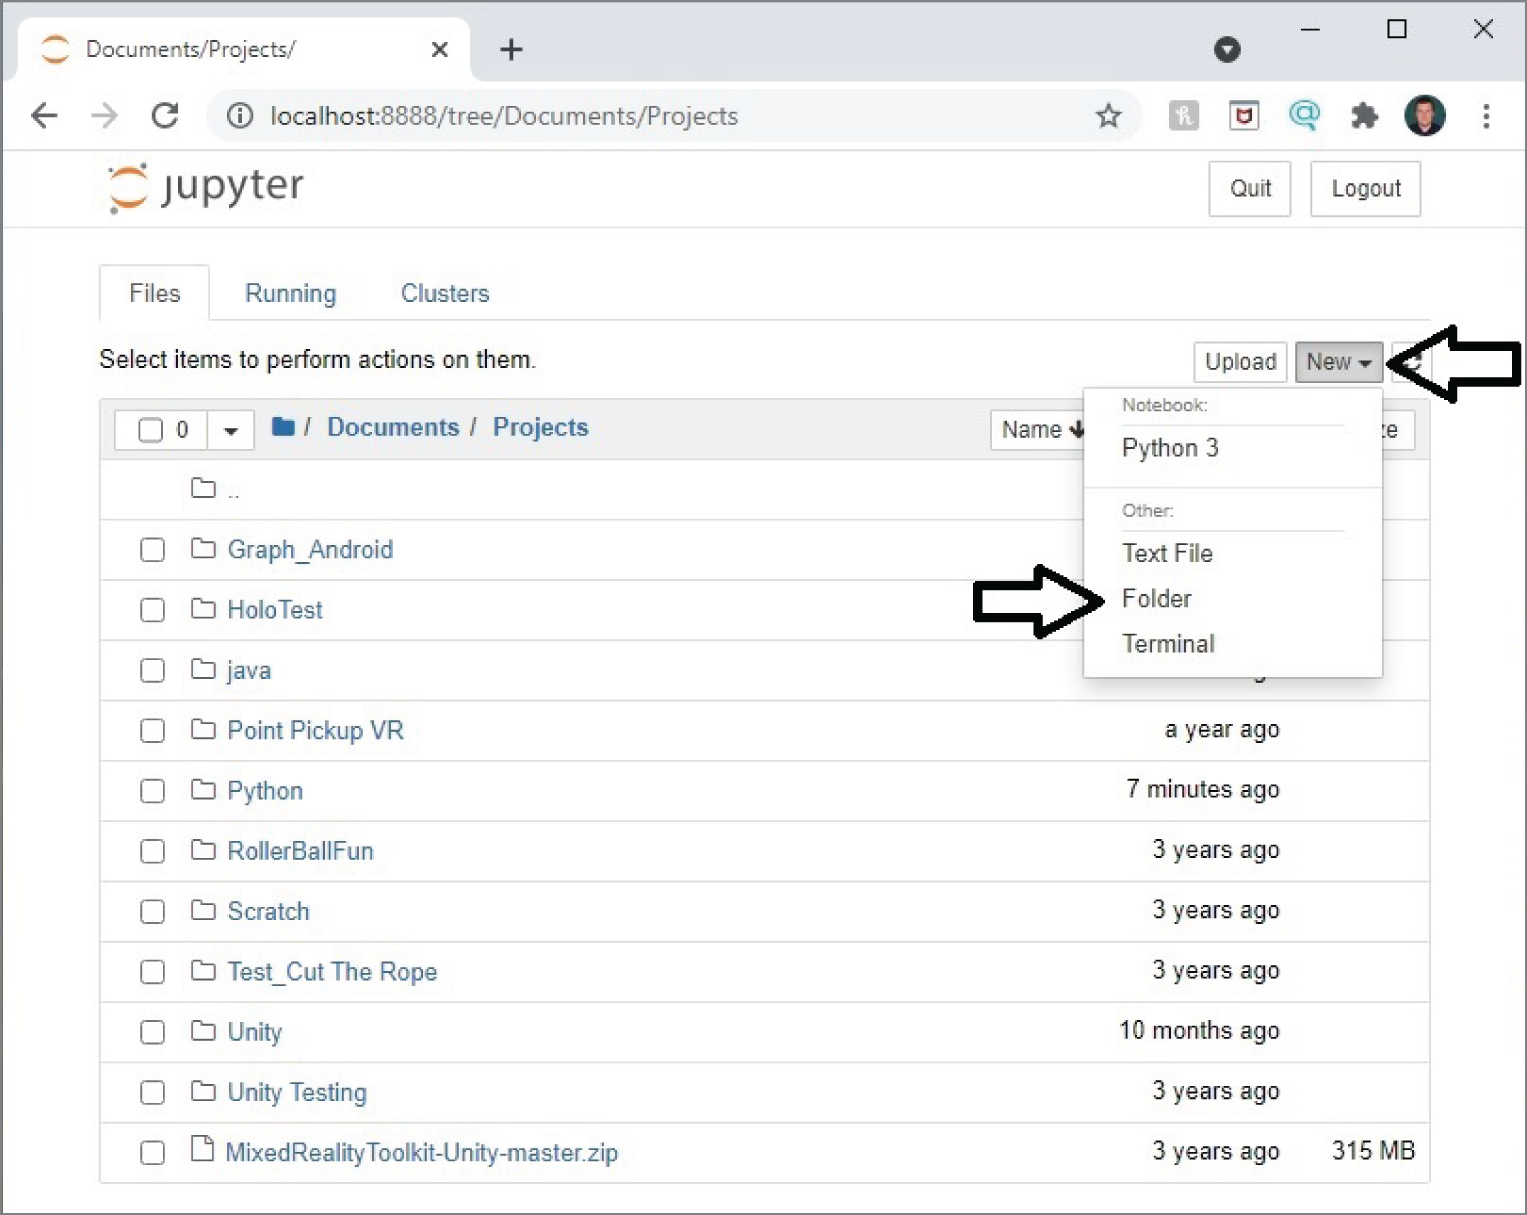
Figure 1.15 Adding a new folder
Once you have navigated to the folder where you want your file, you can add the file by clicking the New button in the upper-right corner again and then clicking Python 3. You can see this option at the top of the menu shown in Figure 1.15.
The new file will open in a new tab in your browser as shown in Figure 1.16. The new file will include one cell ready for you to use.
Let's display a “Hello, World!” message using the Python print command:
print ("Hello, World!")After typing the code in the first cell, click the Run button in the toolbar at the top of the page or use the keyboard shortcut Shift+Enter to view the result. The output will appear in a new block immediately under the code cell. In this case, “Hello, World” will appear under the active cell as shown in Figure 1.17.
You will see that a new cell is created after running the code. You can either enter new code into the new cell, or you can click your existing cell and make changes. If you want to run the same cell again, click it, then click the Run button again.
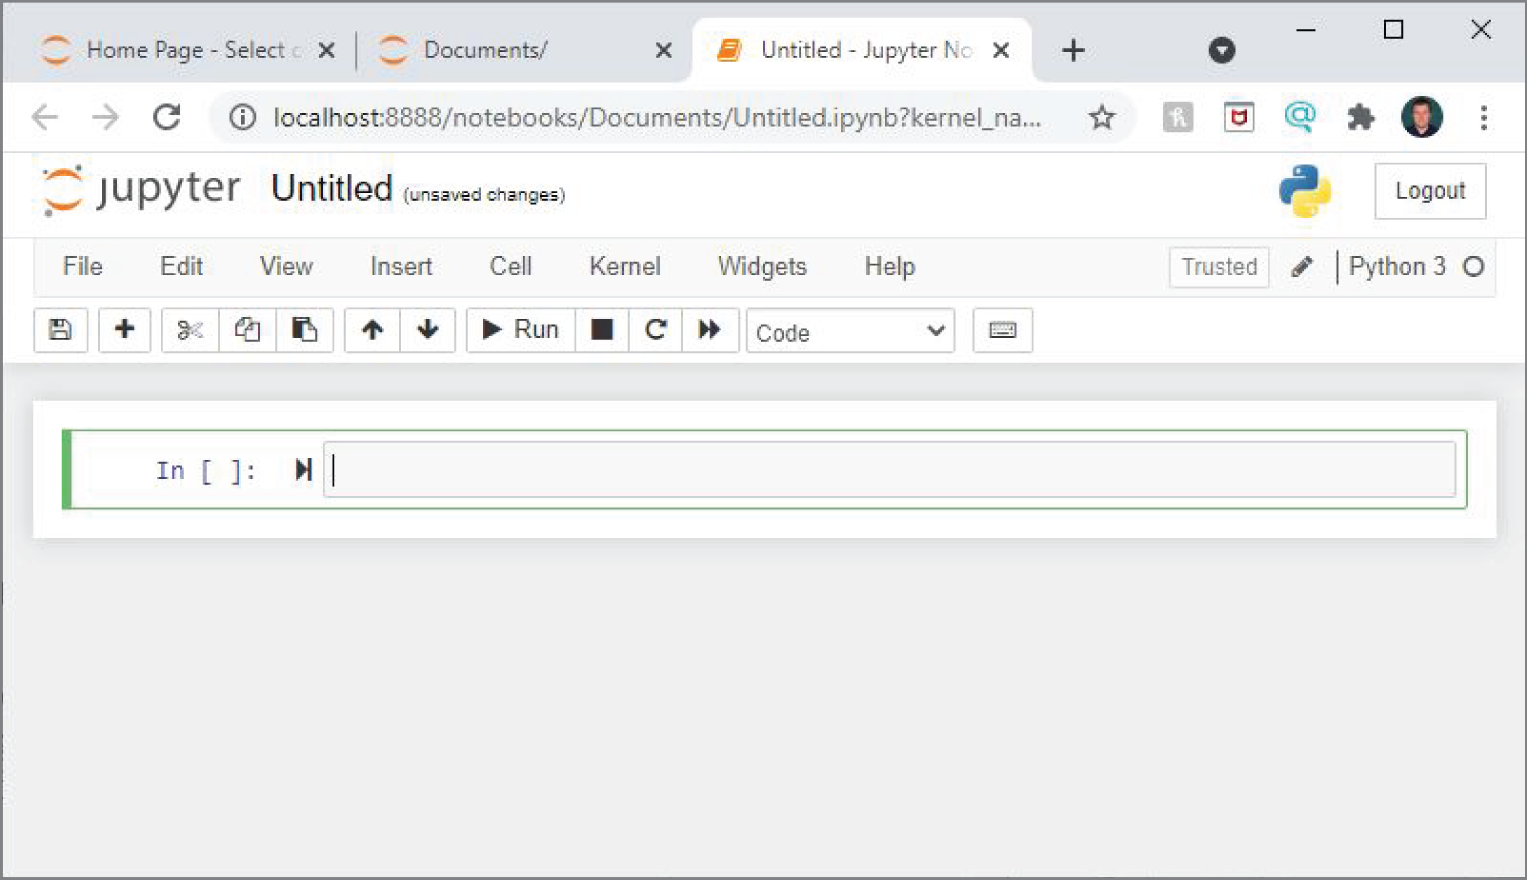
Figure 1.16 The new Python file in Jupyter Notebook
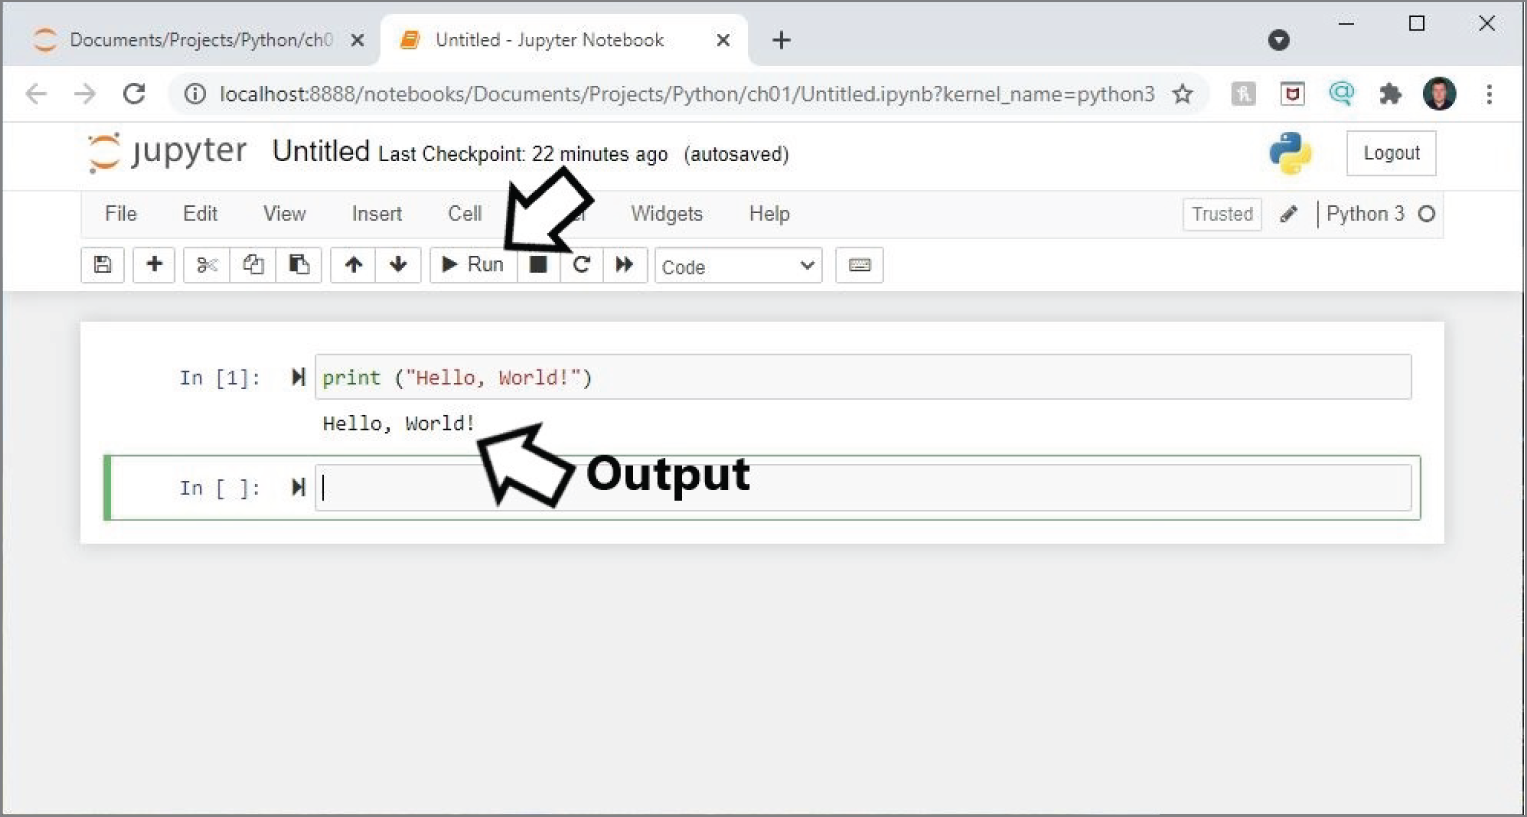
Figure 1.17 Running a Python script in Jupyter Notebook
Renaming a Jupyter Notebook Project File
You can rename the file by clicking the title at the top of the page. A popup window will open, as shown in Figure 1.18, allowing you to enter a new name for the file. Enter the name you want to use and click Rename.
Note
You can also select File and then Rename… from the menus to rename the file
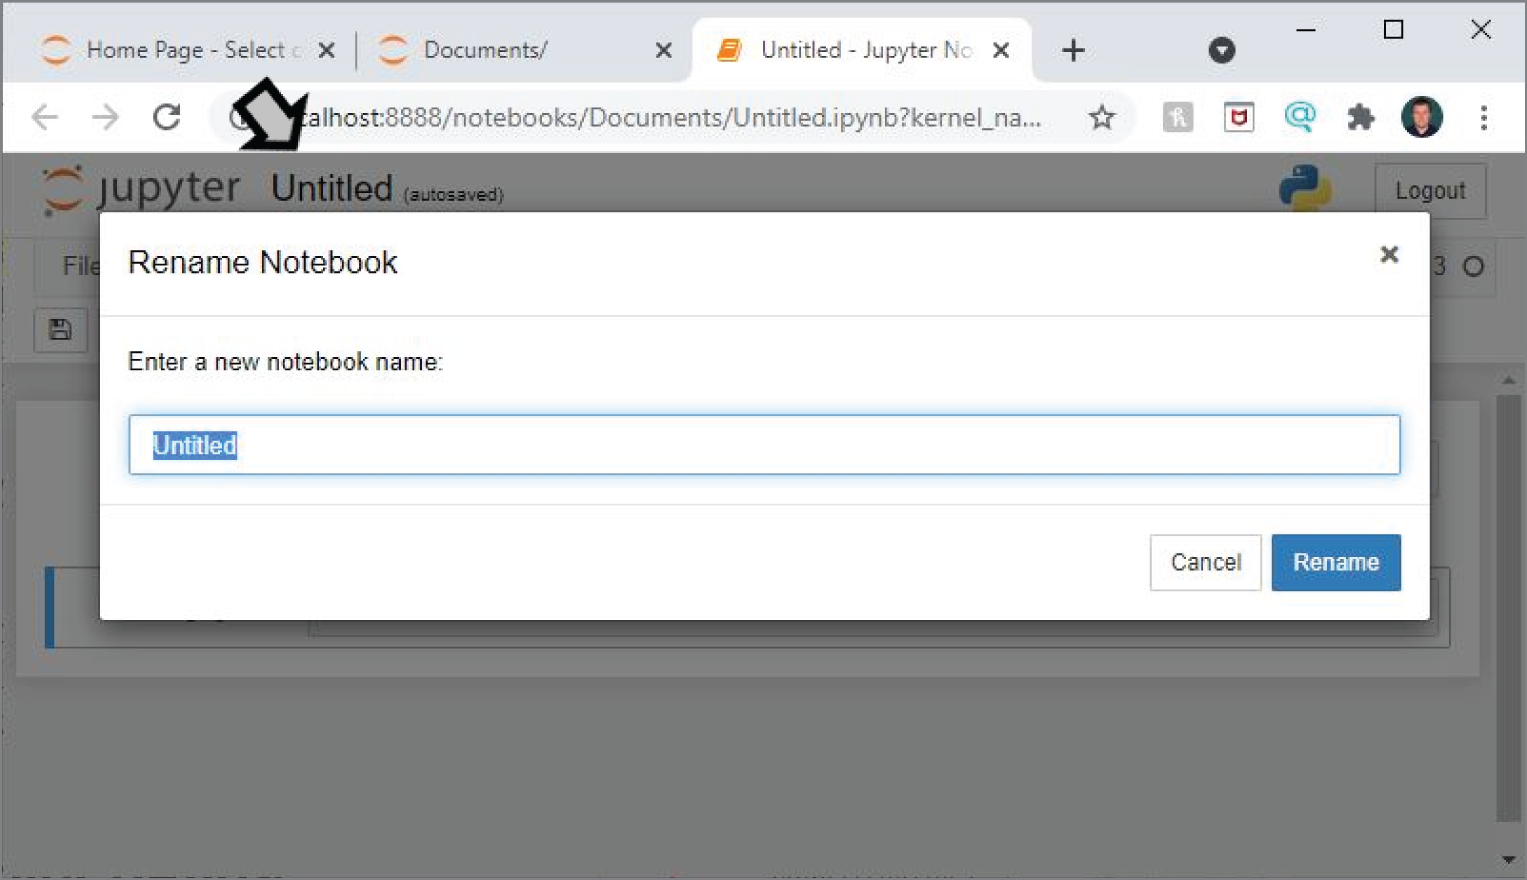
Figure 1.18 Renaming a file in Jupyter Notebook
The new name will appear at the top of the window when the page is opened. The new file will also appear in the list of files in the current folder.
You can save your work as a Jupyter Notebook file by pressing Ctrl+S or selecting File and then Save and Checkpoint from the menu. You can also click the disk icon. After closing the saved file, you should notice it listed in the folder. In the case of Figure 1.19, we renamed the file “Hello World.” You can see it is now saved as a Jupyter Notebook file.
Saving a Python File Locally
You can save your code as a Python file (.py extension) when you have the file loaded in a window. You simply need to select File then select Download as followed by selecting Python (.py) from the menus as show in figure 1.20. This will save a copy of the code in the current file in text format with a .py extension.
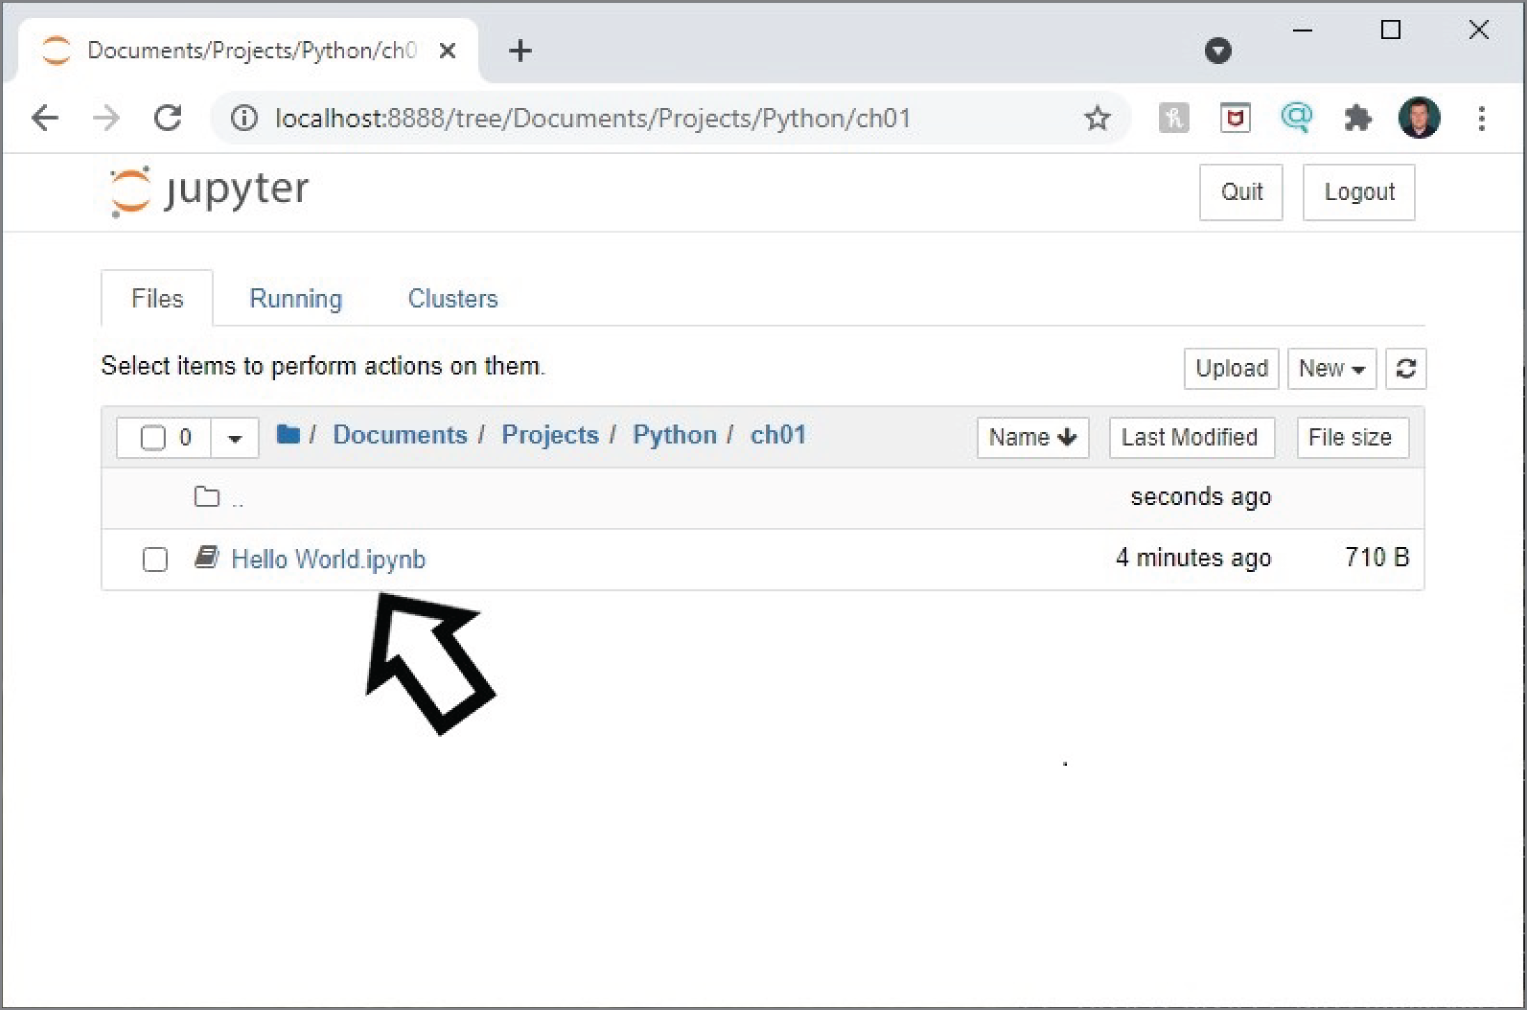
Figure 1.19 The new file in the folder
Opening an Existing Jupyter Notebook File
As you could see in Figure 1.19, Jupyter Notebook files use the filename extension .ipynb, which your computer will not recognize if you try to open a file directly from the file manager. To open an existing file, you will need to start Jupyter Notebook using the previous steps. When you see the list of folders in your browser window, you can again navigate to find the file you want to open. For example, if you want to open a file named HelloWorld.ipynb that is in Documents/Projects/Python/ch01, you would navigate by clicking each folder in the path: Documents, then Projects, then Python, then ch01. Once there, you should see the file.
To open the file, simply click it. The file will open in a new editor tab, leaving the folder tab open so you can easily switch back to it if you wish.
ADDITIONAL RESOURCES
For more information about Jupyter Notebook, see the Jupyter Notebook Documentation at http://jupyter-notebook-beginner-guide.readthedocs.io/en/latest/what_is_jupyter.html.
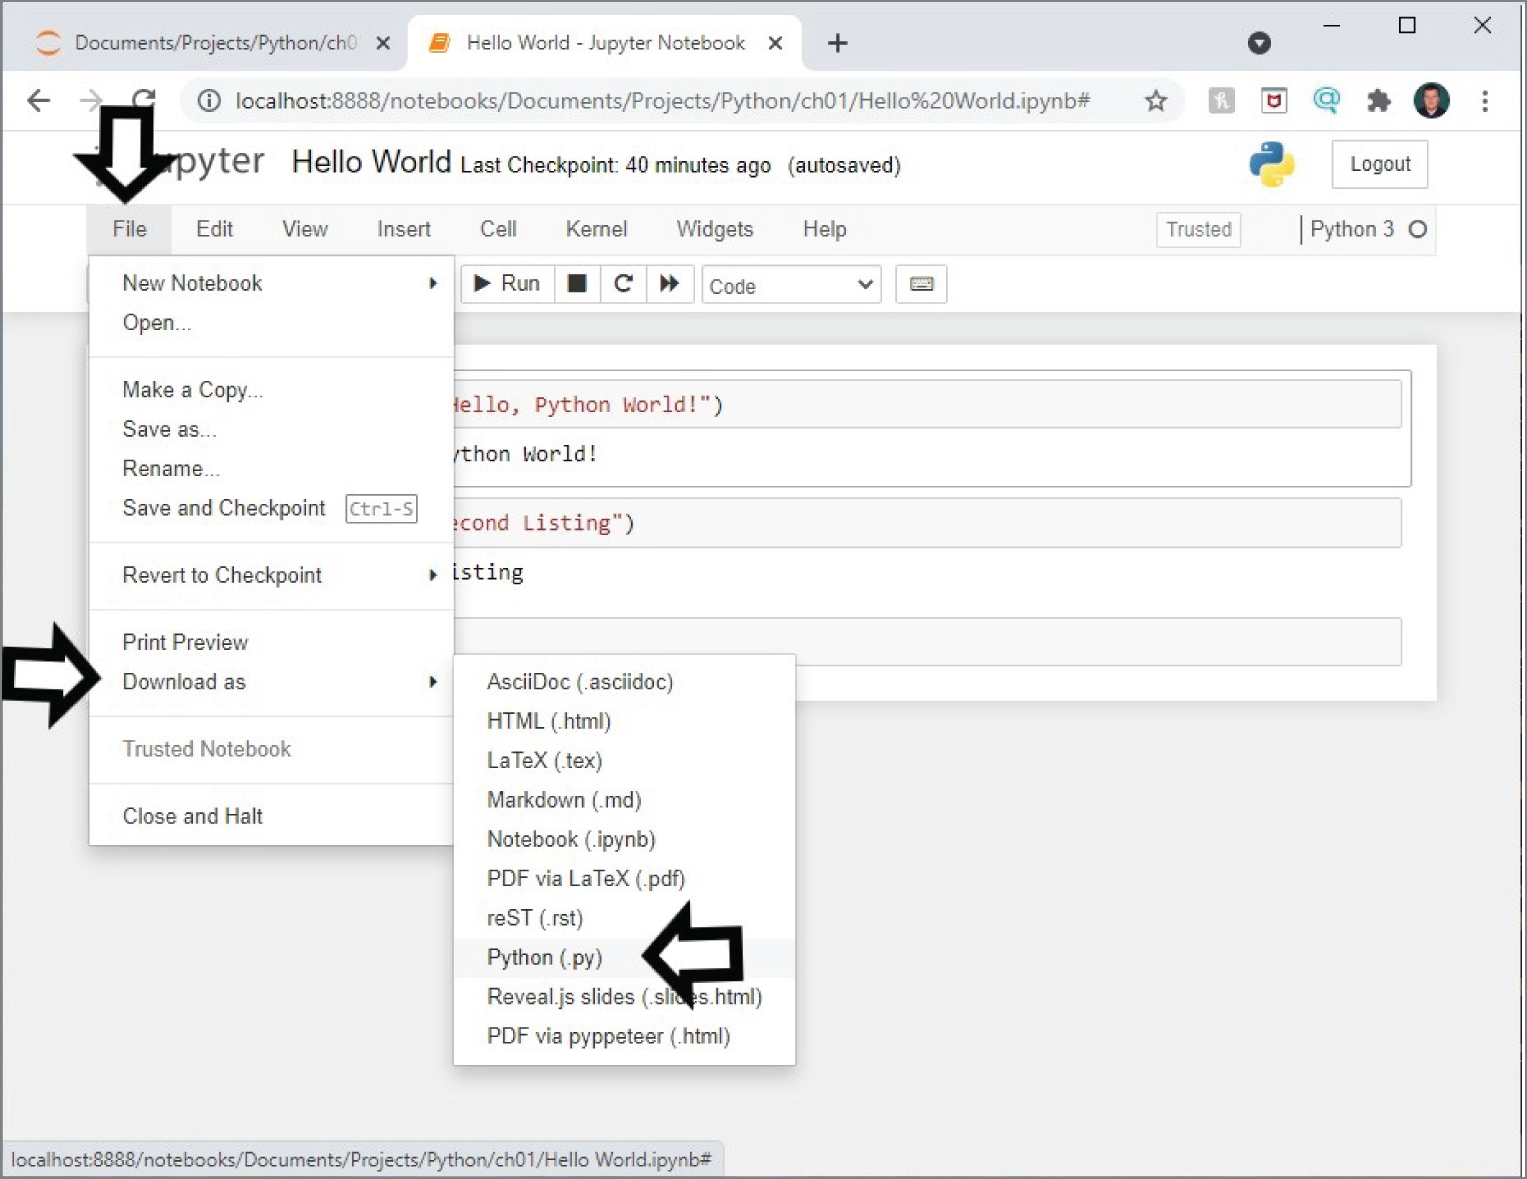
Figure 1.20 Saving a .py file in Jupyter Notebook
A QUICK LOOK AT VISUAL STUDIO CODE
You've now seen Replit, which can be used online without installing anything locally, and you've seen Anaconda Jupyter Notebook, which you can use locally. There are other IDEs that are available as well. Microsoft Visual Studio Code allows you to get started coding Python at no cost.
Visual Studio Code is a powerful IDE that lets you run Python scripts on Windows, macOS, and Linux. As an added bonus, it can be used for many other programming languages. Note that this is just one of many IDEs that are available for you to use. It is beyond the scope of this book to discuss how to use Visual Studio Code; however, we will walk through downloading a copy and adding the Python extension.
Obtaining Visual Studio Code
You can obtain a copy of Visual Studio Code at https://code.visualstudio.com/. When you arrive at this page, you will find an option to download a copy. You should select, download, and install the stable version for your operating system.
After downloading the Visual Studio Code program, you can run it to install the IDE. When you run the installation, you will first be asked to accept the licensing agreement, and then to set the location where you want the program files installed on your computer, to select a system folder, and to select additional tasks such as creating a desktop icon.
When you first run Visual Studio Code, you will be greeted with a welcome screen and possibly release notes.
Adding the Python Extension to Visual Studio Code
In order to be able to fully use Visual Studio Code for Python, you need to add an extension to the IDE. You can do this by clicking the Extensions icon on the left side of the page or pressing Ctrl+Shift+X. Figure 1.21 shows the icon that you should click.
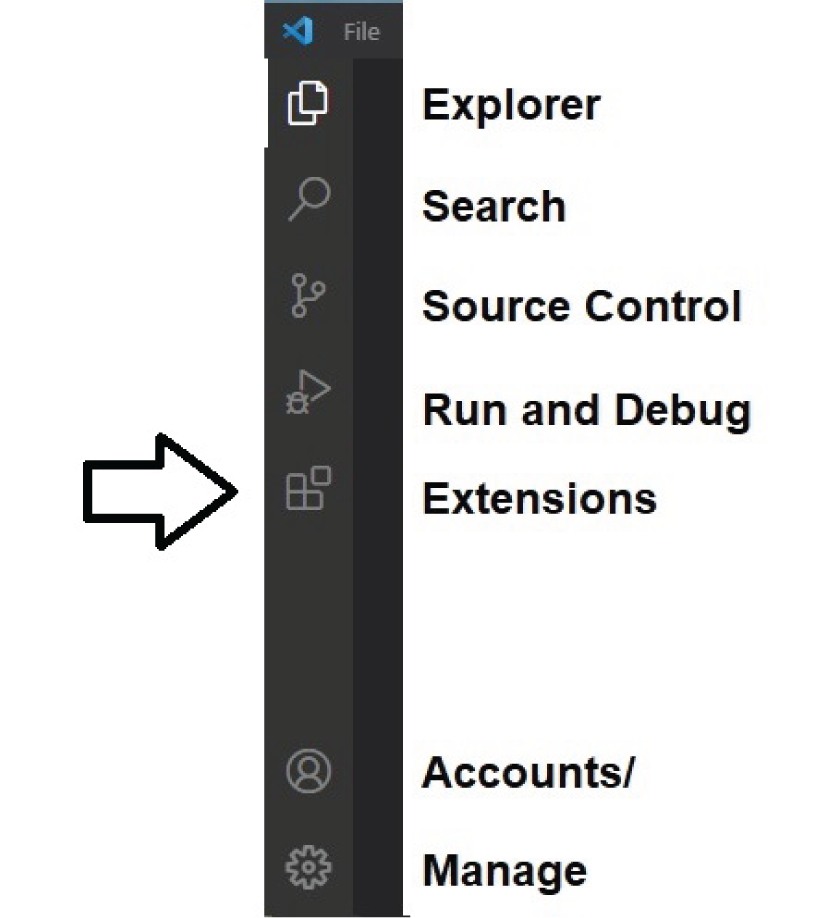
Figure 1.21 The Extensions icon
When you click the Extensions icon, you will be prompted with the Extensions dialog in the left pane of the IDE as shown in Figure 1.22. This dialog shows the language support that has been installed and provides a prompt for you to search for additional extensions within the Marketplace. You can enter Python into the search box and press Enter to start the search.
When you search for Python, you will likely receive a number of search results. These are different Python tools and extensions written by a variety of people and organizations. We recommend you select “Python” with Microsoft as the developer. You can click the Install button to the right, as indicated in Figure 1.23, to start the installation of the extension.
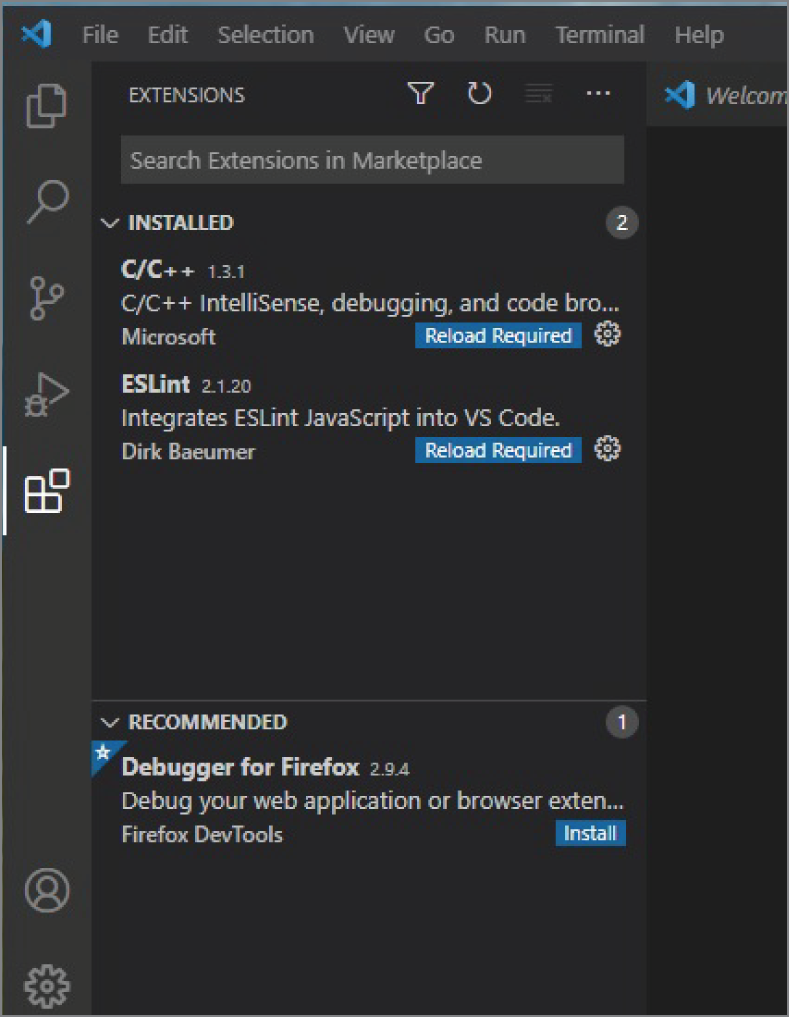
Figure 1.22 The Extensions dialog
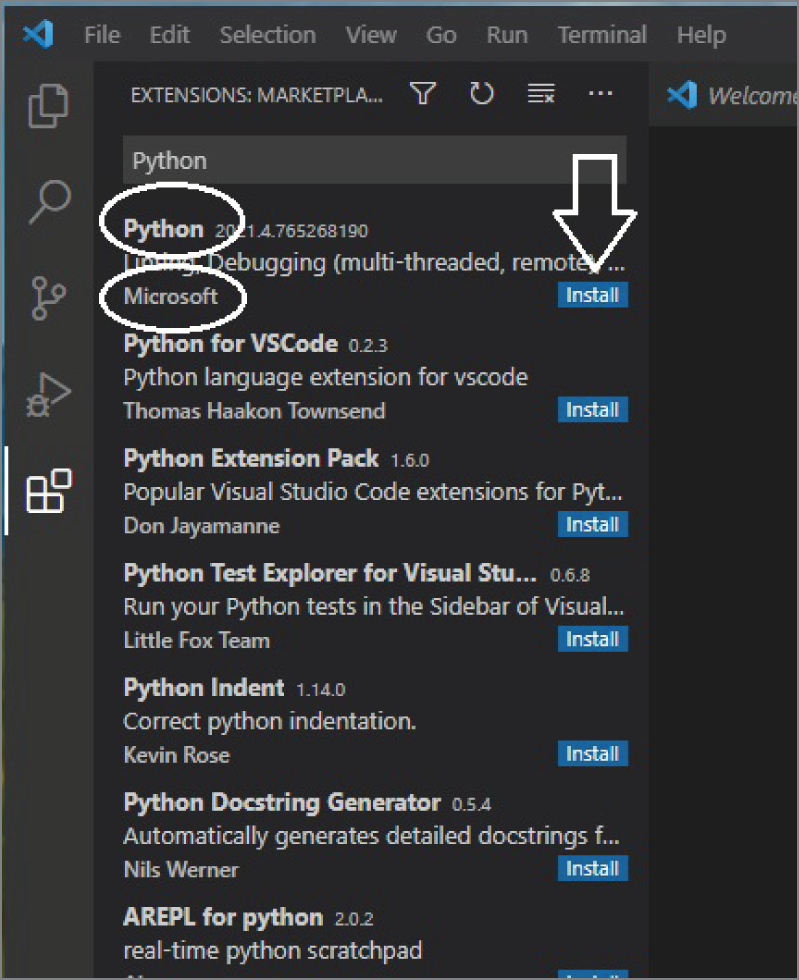
Figure 1.23 Installing the Python Extension
The extension will be installed and a welcome page with details on the extension will be displayed. The welcome page should also present you with a Python getting started page.
Note
Again, it is beyond the scope of this book to detail using Visual Studio Code. You can find help and tutorials through links on the Help menu of the IDE. This includes a number of introductory videos.
USING PYTHON FROM THE COMMAND LINE
If you installed Jupyter Notebook or Visual Studio Code to your local machine, then you should already have Python installed as well. If you did not install a Python IDE locally, you can download and install Python on its own.
You can find the Python files at https://www.python.org/downloads/. When you land on this page, it will have a button to download the current version of Python, similar to what is shown in Figure 1.24. There are also links to get to the download files for other operating systems.

Figure 1.24 Python download page
To install Python, download and run the file for your operating system. If you run this on Windows, you will be greeted with the Setup wizard as shown in Figure 1.25.
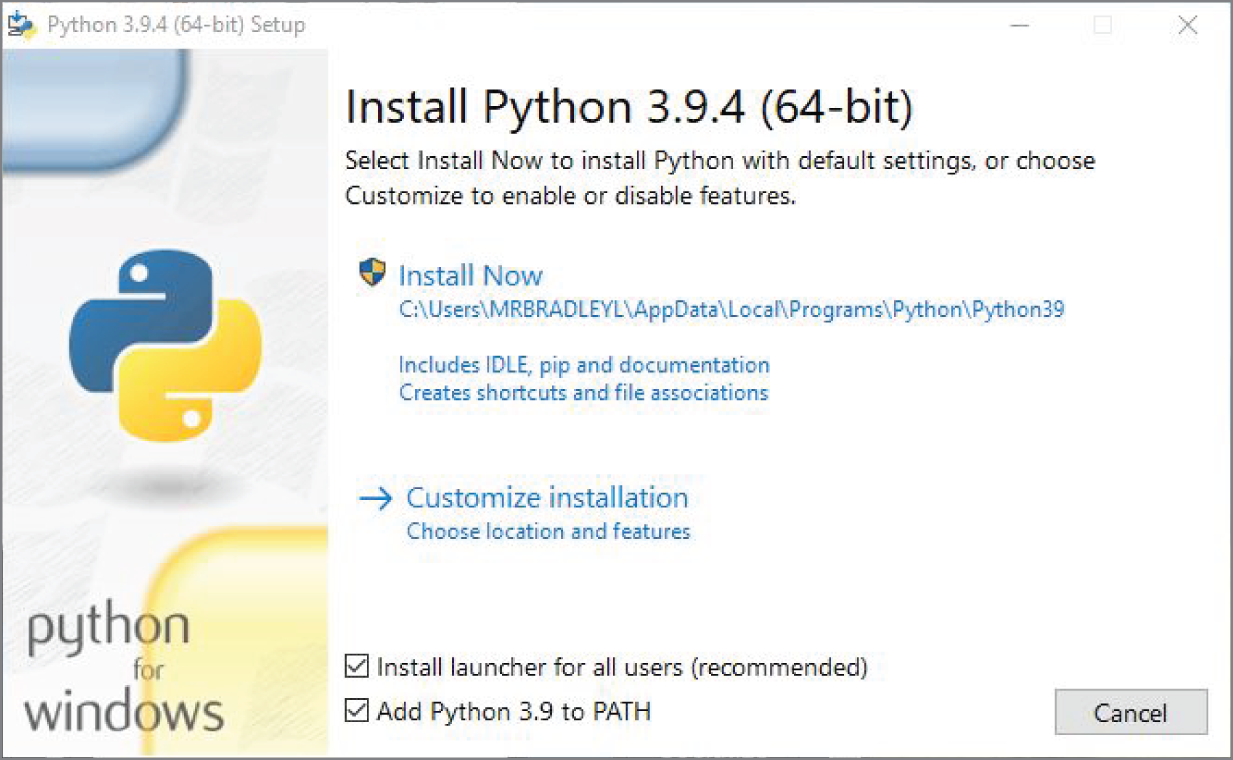
Figure 1.25 The Python Setup wizard
It is recommended that you click the two checkboxes on this dialog box to install the launcher for all users and to add Python to PATH so that it can be accessed from any folder on your system using the command line. If you want to change the location where it will be installed, you can click the Customize installation link. The customization link will also let you add or remove some of the features being installed. It is recommended that other than checking the two boxes on the main dialog in Figure 1.25, you should use the default values for everything else.
Click Install Now to start the installation. This will start the installation and display a status bar as shown in Figure 1.26.
Once the installation is complete, a dialog box will be displayed indicating success. You can click the Close button. At this point, you've installed Python to your system and can close the dialog box.
With Python installed, you can now run Python scripts from the command line. To do that, navigate to the directory where a Python file is saved. At the command line, type python followed by the full name of the file. If the file is called hello.py, type:
python hello.pyPython will then run the script and display the output.
Note
If you are using Windows 10 or later, you can also look for Python in the Microsoft Store and download it from there.
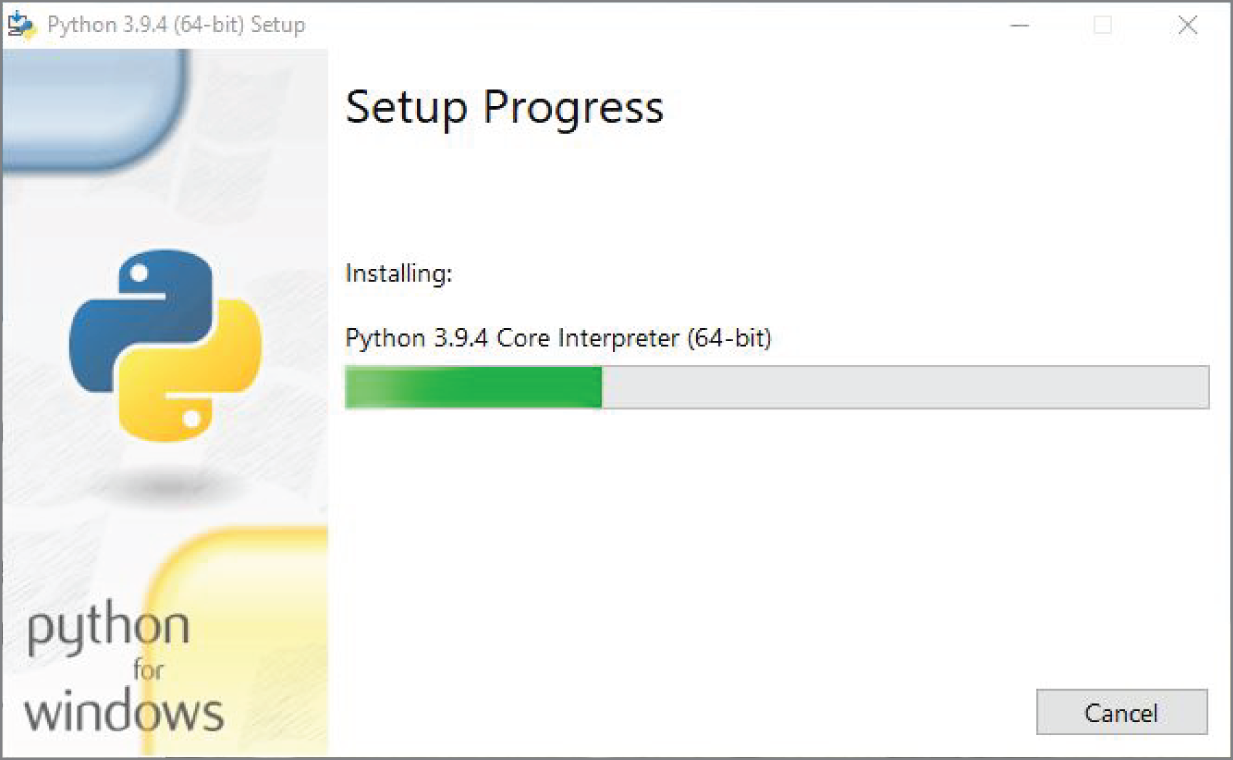
Figure 1.26 Installing in progress
SUMMARY
In this lesson, you learned about a number of integrated development environments (IDEs) that can be used to code and run Python scripts. Three different tools were presented as well as information provided on installing Python to run from the command line. If you are unsure which tool to use, we recommend starting with Replit as it is readily available online and doesn't require any installation.
Now that you have completed Lesson 1, you should
- Know of a few Python tools that are available.
- Learn where you can access an online Python tool to enter and run Python scripts.
- Create and run your first Python script.
EXERCISES
Most lessons will conclude with one or more exercises that you can do to help confirm your understanding of the lesson. You should complete each exercise before moving on to the next lesson. The exercises in this lesson are:
- Exercise 1: Say Hello
- Exercise 2: What's It Do?
- Exercise 3: Counting
- Exercise 4: Fruity Code
Note
Software development skills build on each other, so many of the exercises in future lessons might also require an understanding of the skills and tools presented in earlier lessons.
Exercise 1: Say Hello
Sign up for a Replit account and enter Listing 1.1 presented in this lesson. Run the listing and confirm you get the results shown in the lesson. Change the text that is within the quotes to display your name.
If you installed a different IDE, then enter Listing 1.1 into it and execute the code. Again, confirm you get the result shown in the lesson.
Exercise 2: What's It Do?
Enter the code in Listing 1.2 into an IDE and run it. What is the output?
LISTING 1.2 What's It Do?
x = 2while(x < 100000): print(x) x = x**2You will want to make sure that you enter the code exactly as shown. You should include all spaces and punctuation. You should also make sure that you use the same case for the characters. Print is not the same as print.
Note
Hint: If you entered everything correctly, five numbers should be displayed when the script is run.
Exercise 3: Counting
Enter the code in Listing 1.3 into an IDE and run it. What is the output? Don't worry about what the code is actually doing. Rather, focus on entering the code into your IDE and having it run.
LISTING 1.3 Counting
print("Getting ready to count…")for x in range(10): print("I'm counting and at ", x) # make sure to indent this line!print("Done counting!")Again, make sure you enter the code exactly as presented. When you run the script, you should see output similar to the following:
Getting ready to count…I'm counting and at 0I'm counting and at 1I'm counting and at 2I'm counting and at 3I'm counting and at 4I'm counting and at 5I'm counting and at 6I'm counting and at 7I'm counting and at 8I'm counting and at 9Done counting!Exercise 4: Fruity Code
Enter Listing 1.4 and run it. Again, focus on entering the code into your IDE and running it. You'll learn more about what this code is doing in later lessons.
LISTING 1.4 Fruity code
fruit = input("Enter your favorite fruit and press Enter: ")print("Your favorite fruit is ", fruit)When you run this, the output should look like the following, except with the fruit you enter:
Enter your favorite fruit and press Enter: pearYour favorite fruit is pear