Getting Started
Setting up the development environment
The project in this book will be developed in a local development environment (localhost). You can also build the whole theme directly in a remote environment (hosting/live server), but the local development environment is by far the most suitable.
The main reason for this is that you will always have more control over it. You can also set variables like server memory usage, space used, application versions, libraries, and many other resources that you wouldn't have control over in a remote environment, especially when it comes to shared hosting.
The exceptions are the so-called VPS (Virtual Private Servers), where you also have control over several services, but this will not be the case in this book.
For this project, our environment will have the following settings:
- Operating system: macOSX
- Web server: XAMPP 7.3.2-2, available at https://www.apachefriends.org/index.html
- IDE: Sublime Text 3.2.1 build 3207, available at https://www.sublimetext.com/3
- WordPress Version: 5.2.2
- Web browser: Google Chrome 76
Those are only suggestions. If you wish, or if you are already used to it, you can work with another operating system, use another web server, a different web browser or IDE. You can also use different configurations and versions from mine.
Local server installation and configuration
There are several possible choices for a localhost implementation. To have a minimally functional environment, we need not only the server itself but also something that allows us to create and manage the databases. We also need the PHP language library itself.
When it comes to a hosting/live server, the official WordPress website recommends the following configuration:[2]
- PHP version 7.3 or higher
- MySQL version 5.6 or higher (or MariaDB version 10.1 or higher)
- Nginx or Apache server with mod_rewrite module
- HTTPS support
For a local server, however, your personal computer running Microsoft Windows is also acceptable.
More advanced users can choose to install all features in a more customized way. Most users, however, can choose more straightforward solutions such as XAMPP.
XAMPP is a package that comes with Apache server, MariaDB (equivalent to MySQL), and PHP. It is easy to install and can be easily configured on any of the most widely used operating systems today. The "X" in XAMPP refers to the fact that it is multi-platform and can be used on any operating system. You can download it by visiting the project's website, at https://www.apachefriends.org/.
Choose the version of XAMPP corresponding to your operating system and download the installation file to any location on your computer. The compressed file will include the latest version of PHP. You can also choose other options by clicking the "Download" option from the top menu.
By doing this, you will see some boxes like the one below:

Image 1 - Download options for Windows
The package installation may vary according to the operating system used. A couple of tips:
Microsoft Windows users:
If you are using Windows, I recommend that you right-click on the installation file and choose "Run as administrator" before installing the package. You must do this since XAMPP will need special permissions during the installation. Not doing this may cause Windows to treat the installer as some malicious item and result in misconfiguration.
Mac OS X users:
My personal opinion is that it is not necessary to download the XAMPP-VM version, which is available right on the home page. I prefer to use the versions without the VM by clicking on the "Download" menu and choosing from the various options available.
If you know how to use XAMPP-VM, go ahead. But if you are not sure what it does, then download a non-VM version. This way, you can follow the installation steps the same way, as shown in this book.
Once you have downloaded and run the installation file, just follow the process. It will be very similar, regardless of the operating system you use.
Clicking Next will launch the installation process:
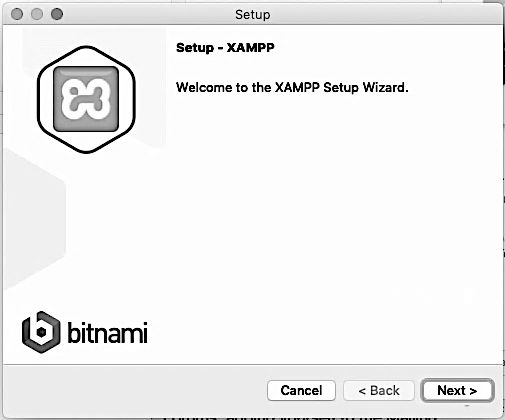
Image 2 - XAMPP installation start screen
Again choose Next to install the necessary components. Or deselect the components you don't want to be installed, before clicking Next again.
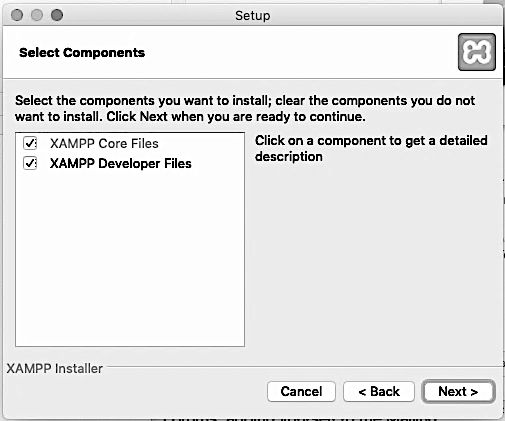
Image 3 - Component selection screen
Select the folder on your computer where you want to install XAMPP or click Next to accept the default folder. On Windows, the default folder will be C:\xampp. On Mac OS X, it will be Applications/XAMPP.
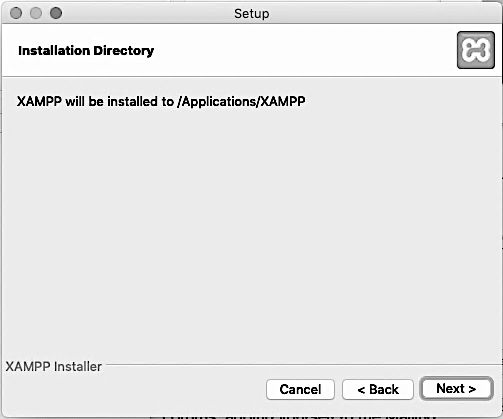
Image 4 - Installation directory selection screen
Uncheck the option that allows the installation of Bitnami, because we will not need it. Click Next again.
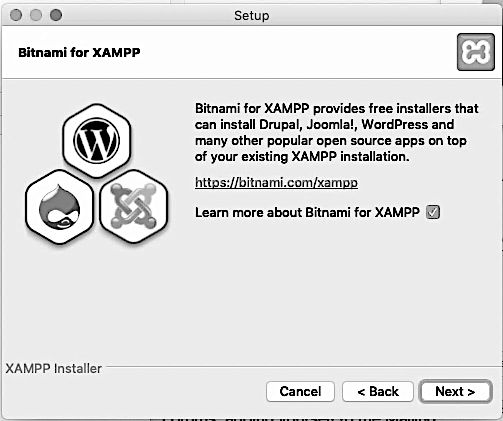
Image 5 - Optional Bitnami installation
Click Next again to start the installation itself.
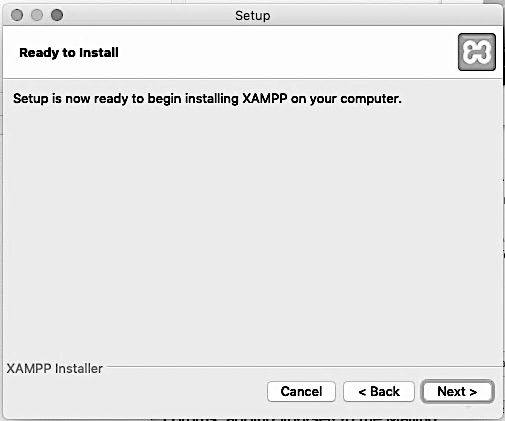
Image 6 - Setup finishing screen
You may have to give some additional authorization during the process. You can accept it without any problems.
Click "Finish" to finish the installation and run the XAMPP control panel.

Image 7 - Final installation setup screen
On Windows, you will have to choose the application language. Choose the English language and click "Save."
On Microsoft Windows, the application will open the control panel automatically. If the software won't start, you can search for the XAMPP folder on the Start Menu and choose "XAMPP Control Panel." You can also double-click the XAMPP icon in the system tray.
On macOS, you can search for XAMPP on the Launchpad and run the "manager-osx" application, or search for this application using Spotlight.
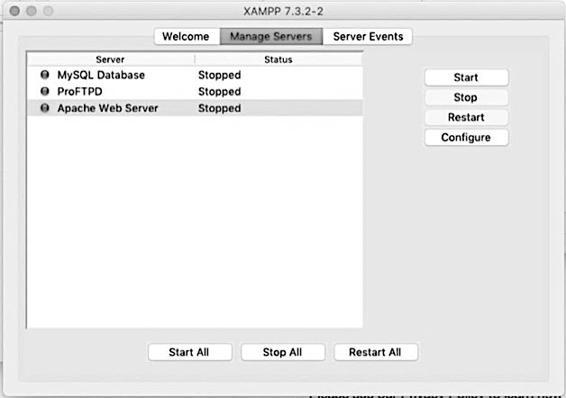
Image 8 - XAMPP control panel on macOS
From the control panel, you can start and stop all the necessary servers. In our case, we need both the Apache web server and MySQL database server to be running. To do that, just choose the server, click on the "Start" button and wait until both turn to green.
If any of the servers show up in red, you can get an idea of what is happening by reading the error messages in the log window below (on Windows) or by clicking the "Server Events" tab (on macOS). The most common problem is caused by conflicts with the ports used by the webserver (ports 80 and 443) when they are already taken by another application. You can find several tutorials explaining how to solve this problem. A quick search for the terms "xampp port error" can help a lot.
After all this, you will already have your local environment ready to use. You can use this environment to create different PHP sites and applications, just like you can do in a live server.
To check if the two active servers are working, open up your browser and type http://localhost/phpmyadmin. That will open the phpMyAdmin database manager. The web server can be accessed at http://localhost. If you see something like the screen below, it means it is running.
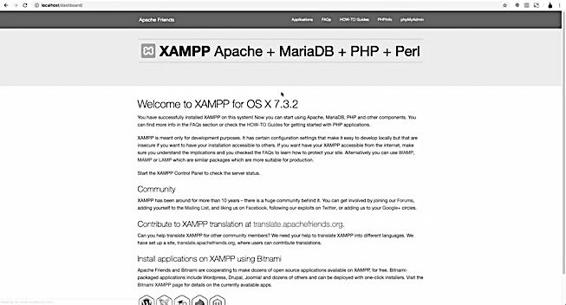
Image 9 - XAMPP Welcome Screen
From now on, all your web projects, regardless of whether they will be used for WordPress or not, will be created within the following directories:
C:/xampp/htdocs (on Windows)
/Applications/XAMPP/htdocs (on macOS)
For our project, for example, we will be creating a new folder within this directory called learnwp. Later, all your other projects can also be created inside the htdocs folder, with different names, of course.
To access each of them, just type in the browser http://localhost followed by the name of the created directory.
An example would be the following:
http://localhost/learnwp
WordPress installation and configuration
We might say that we can divide a WordPress installation into two layers.
The first layer corresponds to the installation files, a set of libraries, scripts, which comprise the so-called WordPress core, along with files belonging to the plugins and themes of that specific installation.
The second layer corresponds to the database. It comprises a series of tables in MySQL format, which belong to WordPress itself and sometimes to the plugins and themes of the specific installation.
So far, we have the environment, upon which WordPress will run, all set up. It is essential that this environment, with Apache and MySQL servers, is working. Otherwise, the WordPress installation will not be possible.
For the first step, please visit the official website at
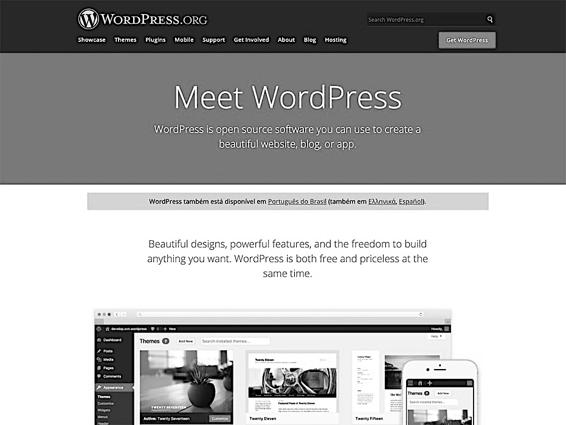
Image 10 - WordPress.org Home Page
Click the blue button with the text "Get WordPress" in the top right corner and save the compressed file to the htdocs folder.
After uncompressing the file, you should see a folder called wordpress. Change the name of this folder to learnwp. That will be the directory from which the WordPress installation will be accessed.
For now, leave everything the way it is and get the database ready to receive WordPress.
Open up your browser and type http://localhost/phpmyadmin to launch the phpMyAdmin database manager.
Click on "Database" and enter a name for it. Try not to use spaces or special characters for the database name. For example, wp_learnwp.
The recommended database collation type for WordPress is utf8mb4_unicode_ci. If your collation is different, choose that option from the dropdown menu next to the database name text box.
Then click "Create."
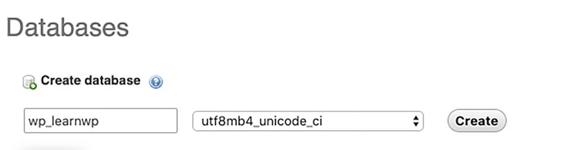
Image 11 - Creating a database in PHPMyAdmin
We can now finish the installation. Open a new tab in your browser and type http://localhost/learnwp. Remember, learnwp is the name given to the folder where the WordPress files are:
C:/xampp/htdocs/learnwp, or
/Applications/XAMPP/htdocs/learnwp
Once you have done this, choose the language of the installation (if needed). After that, you will see the WordPress installation start screen. Click on "Let's go!".

Image 12 - WordPress initial installation screen
If you are on macOS, at some point during the installation, you may be getting a message saying that WordPress cannot create the wp-config.php file. If that happens, please refer to Appendix C of this book.
The next screen will ask you to provide some data relative to the database you created:
Database name: Enter your database name. In my case, the name will be wp_learnwp;
Username: in most cases, the local server user is root.
This name will only be different if you have deliberately created a new database user and granted all privileges to it;
Password: the default password is always empty;
Database server: on the local server, this name will always be localhost;
Table prefix: change this to a more reliable name, for example, wplrnwp_
You must enter a prefix other than wp_ for the database.[3]
It does not make much difference on a local installation, but it can prevent automated attacks from reaching WordPress tables in a hosting environment.
If you consider migrating your installation to a live server later, I highly recommend that you change the table prefix at this point of the installation.
Changing the prefix may also be helpful if you want to run more than one WordPress installation on the same database.
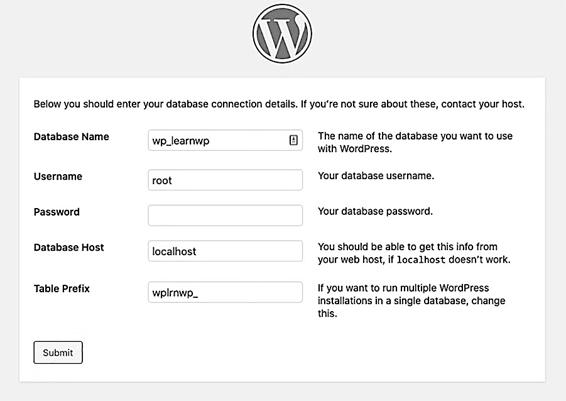
Image 13 - Database connection details
By clicking "Submit," you will start the second part of the installation. Click "Run the installation" on the next screen and enter the requested data:
Site Title: type in any title for the site;
Username: enter a username following the description below the field. Avoid using names such as admin or wp. Such names are frequent targets in brute force attacks and can make your installation vulnerable;
Password: accept the automatically-generated password or enter a strong one. The display will help you set an acceptable password;
Your email: enter your best email. This field, like the others, can be changed in the control panel later;
Search Engine Visibility: define whether or not you want search engines like Google index your site. In a local installation, it doesn't make much difference, but do remember to check the value of this field later (under Configuration -> Reading) if you migrate your site to a production server.
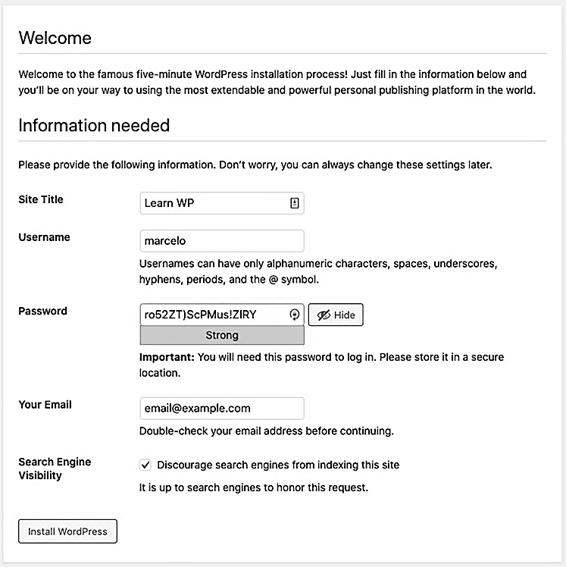
Image 14 - Setting up admin info before installation
Click "Install WordPress," and the installation is done.
Then click "Log In," enter the same username and password you entered on the previous screen, and you will be inside the WordPress admin dashboard. It will help us create the content and features we need.
If you go over to Appearance -> Themes, you'll see that WordPress ships with some native themes. Their name is always related to the year in which they were created.
In this book, you will learn how to create your own theme, customizing it with the various tools I will introduce in the following chapters.
Enabling debug mode in WordPress
While developing any WordPress theme, you must work with debug mode enabled. That allows you to see all errors generated by the PHP code, as well as warnings and alerts.
Without debug mode, only fatal errors or, even worse, blank screens will be displayed by the server, which often doesn't offer a clear picture of what is wrong with your code.
Very often, the message may indicate things that are not critical, such as warnings or notices, but it's always good to have control over what is not going well in the code. Most of the time, it's quite easy to fix them.
You'll also have access to messages about deprecated (obsolete) functions or arguments, which can pose security threats when used in some situations.
A basic implementation can be done in the wp-config.php file, changing the WP_DEBUG constant from false to true. Like this:
// Enable WP_DEBUG mode define( 'WP_DEBUG', true );For more debug options, refer to the official documentation at https://wordpress.org/support/article/debugging-in-wordpress/
Remember that debug mode should not be enabled on sites that are already in a production environment. Use it only in tests or while developing the theme.
At the end of this chapter, it is worth remembering that the process of installing WordPress in a local environment can often lead to many frustrations.
Some people give up working with WordPress in a local environment due to errors that come up during the process. Others give up completely right at the beginning.
If that is your case, Appendices B and C in this book may provide several tips to help you get around those problems. That was my attempt to bring the solution to the most common errors, both in XAMPP and WordPress installation, in the most used operating systems.
I hope the tips can be useful.