Github is one of the best ways to share code and collaborate. In this article, we are going to learn how to consume their API and how we can use it to accomplish some of our daily tasks.

What We’re Building
We are going to explore some of the daily tasks that can be accomplished through the Github API and build a small app using Laravel to illustrate the use cases. You can check the final result on Github.
Authorisation
Before starting to consume the API, we need to set some form of authorisation. The API gives you access to all publicly available data, but some endpoints need user permission. You can create a new token with some specific scope access using the application settings. The scopes depend on your application’s needs, like accessing user email, updating user profile, etc.
Password authorisation is only necessary in some special cases, like accessing user authorised applications. In that case, you need to provide your username or email, and your password.
Setting Up Our Application
For our sample app, I will be using Laravel 5 and the KnpLabs Github PHP implementation. Be sure to update your composer.json file. Rename .env.example to .env after creating a new Laravel project (composer create-project laravel/laravel) and update it with your credentials.
// .env
APP_DEBUG=true
GITHUB_EMAIL=USER_EMAIL
GITHUB_USERNAME=USERNAME
GITHUB_PASSWORD=PASSWORD
GITHUB_TOKEN=ACCESS_TOKEN
Your don’t really need to add your username and password, we only use them to illustrate the limitation of using the token authentication.
Binding Github Client
// bootstrap/app.php

$app->singleton(‘Github\Client', function(){
  $client = new Github\Client();

  return $client;
});
You may have noticed that we didn’t use our token. This is because most of the public actions are done without any authorisation, but for every endpoint you’ll find the level of authentication needed to access it.
Routing
Our demo will include several main functionalities.
- List user repositories.
- Navigate through the user repository files.
- Edit and commit a file.
- List the repository’s latest commits.
// app/Http/routes.php

Route::get('/', ['uses' => 'GithubController@index', 'as' => 'index']);

Route::get('/finder', ['uses' => 'GithubController@finder', 'as' => 'finder']);

Route::get('/edit', ['uses' => 'GithubController@edit', 'as' => 'edit_file']);

Route::post('/update', ['uses' => 'GithubController@update', 'as' => 'update_file']);

Route::get('/commits', ['uses' => 'GithubController@commits', 'as' => 'commits']);
Controllers
The GithubController class is our main controller and holds most of the logic. When the class constructor is called, we resolve the the Github\Client class from the container and load our username environment variable.
// app/Http/Controllers/GithubController.php

class GithubController extends Controller
{

  private $client;

  /*
   * Github username
   *
   * @var string
   * */
  private $username;

  public function __construct(\Github\Client $client)
  {
    $this->client = $client;
    $this->username = env('GITHUB_USERNAME');
  }

}
Listing Repositories
Repositories by Username
You can retrieve the repos by username using the /users/:username/repos endpoint. We can access the endpoint like so:
$repos = $this->client->api('user')->repositories($username);The api method will resolve the needed class depending on the parameter (user, current_user, repo, etc).
Authenticated User
The other way is to retrieve the current authenticated user repositories using the /user/repos endpoint. The main difference is that private repos are hidden when using only the username endpoint.
// client is our Github\Client
$repos = $this->client->api('current_user')->repositories();
Now that we know the first benefit of using authenticated requests, let’s add our token to the Github\Client binding.
$app->singleton('Github\Client', function () {
  $client = new Github\Client();
  $token = env('GITHUB_TOKEN');

  if (!isset($token)) {
    dd("Github token is not set.");
  }

  //$client->authenticate(env('GITHUB_EMAIL'), env('GITHUB_PASSWORD'), Github\Client::AUTH_HTTP_PASSWORD);
  $client->authenticate($token, null, Github\Client::AUTH_HTTP_TOKEN);

  return $client;
});
The authenticate method decides the authentication process using the third parameter constant, if you chose the email and password method, be sure to change the assertion test. You can check the docs for more info.
// app/Http/Controllers/GithubController.php

  public function index()
  {
    try {
      $repos = $this->client->api('current_user')->repositories();

	  return View::make('repos', ['repos' => $repos]);
    } catch (\RuntimeException $e) {
      $this->handleAPIException($e);
    }
  }//index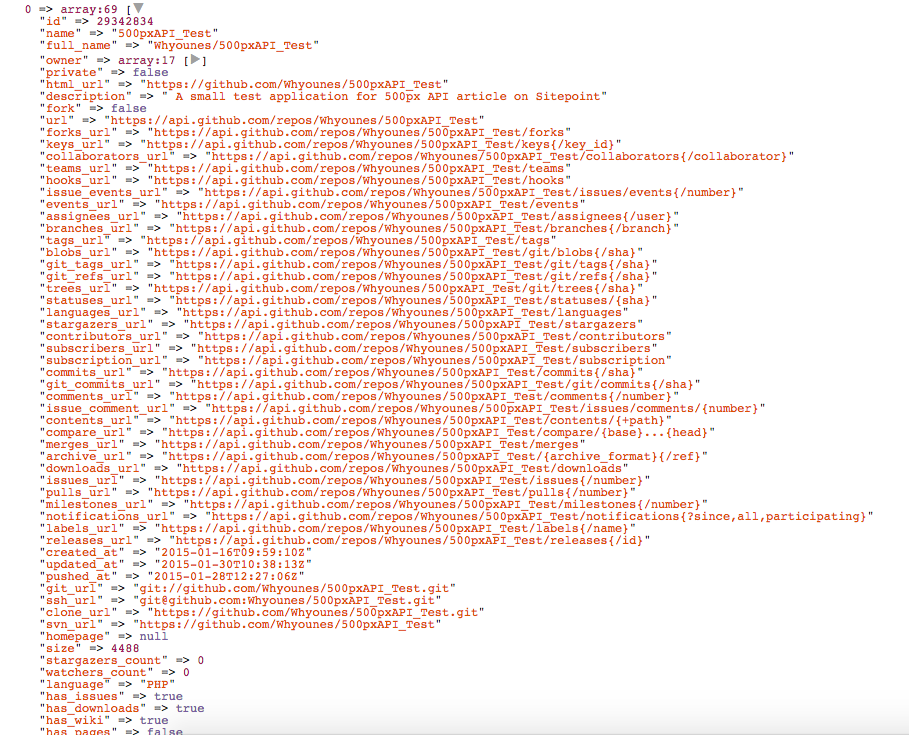
The repo name is passed to the next route, and it’s used to query the API for the repository content. You can read more in the docs.
// app/resources/views/repos.blade.php

@extends('layouts.master')

@section('content')

    <div class="list-group">
        @foreach($repos as $repo)
            <a class="list-group-item" href="/finder?repo={{ $repo['name'] }}">
                <h4 class="list-group-item-heading">{{ $repo['name'] }}</h4>
                <p class="list-group-item-text">{{ $repo['description'] }}</p>
            </a>
        @endforeach
    </div>

@endsection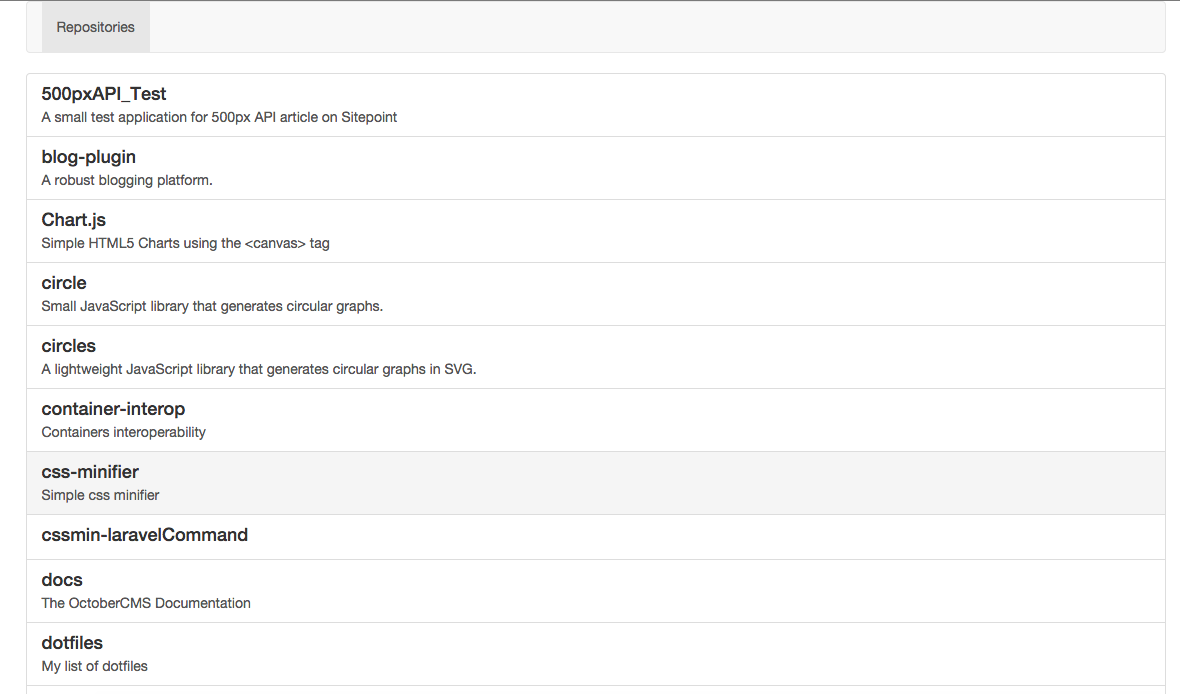
The page can also display the stargazers count, download count…etc. When the user clicks on the link we need to load the repository content and provide the ability to browse the repository files.
Repository Content
To retrieve a repository’s content, you need to specify the owner, repository name and the path that you want to retrieve. You can read more in the docs.
// app/Http/Controllers/GithubController.php

public function finder()
{
  $repo = Input::get('repo');
  $path = Input::get('path', '.');

  try {
    $result = $this->client->api('repo')->contents()->show($this->username, $repo, $path);

    return View::make('finder', ['parent' => dirname($path), 'repo' => $repo, 'items' => $result]);
  } catch (\RuntimeException $e) {
    $this->handleAPIException($e);
  }
}//finder
The Github\Api\Repository\Contents@show method accepts four parameters, the fourth one is the branch and it defaults to master.
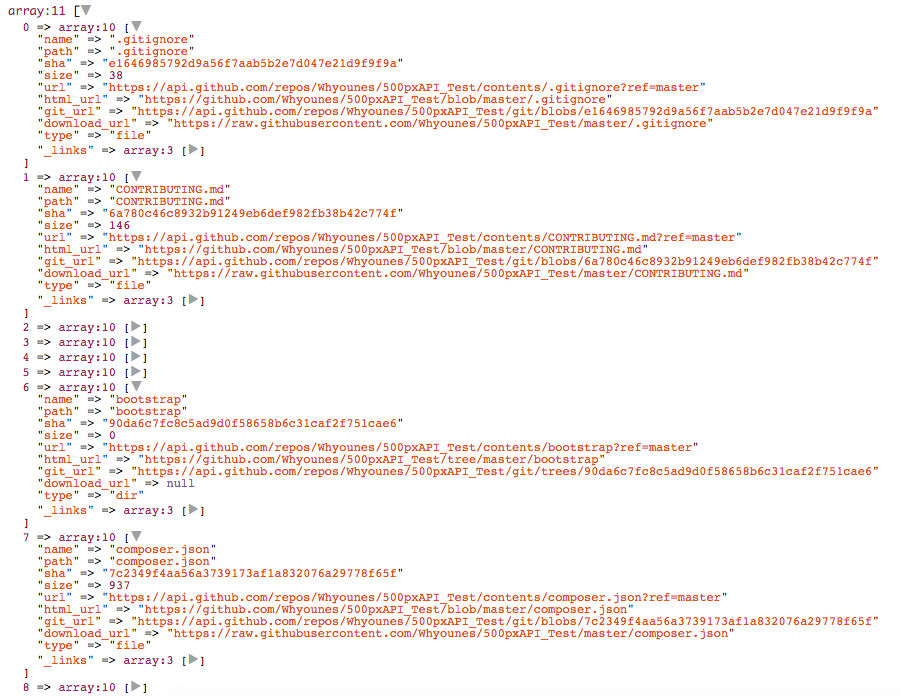
When the user selects a folder we reload the same page with the new path, and when selecting a file we redirect them to the edit page.
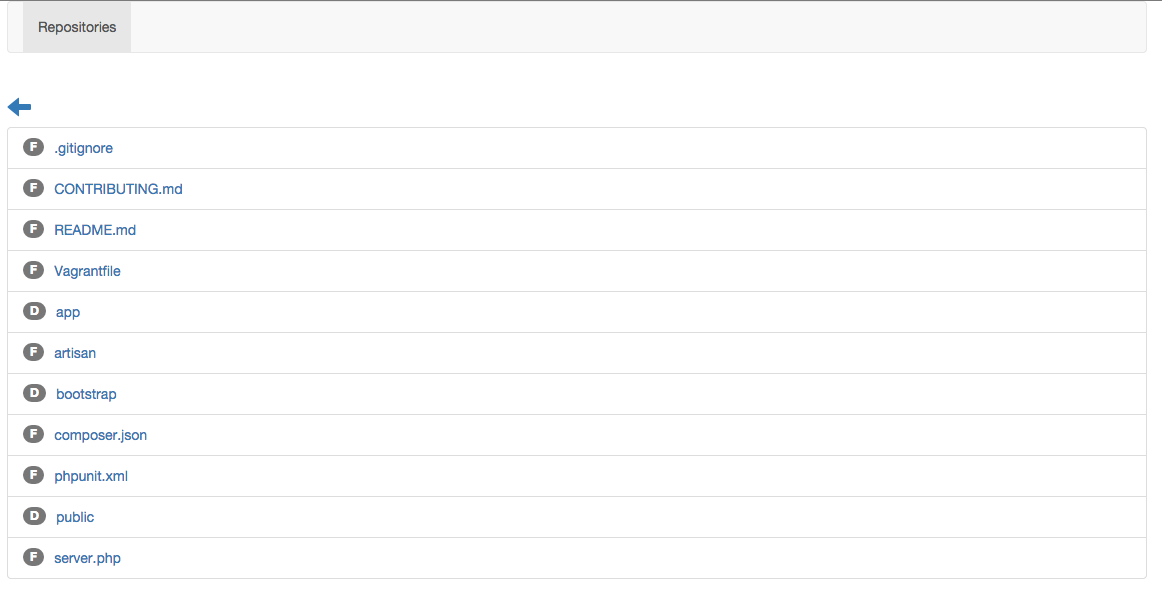
// app/resources/views/finder.blade.php

<ul class="list-group">
    @foreach($items as $item)
        <li class="list-group-item">
            @if(isset($item['type']) && $item['type'] == 'file')
                <a href="/edit?repo={{ $repo }}&path={{ $item['path'] }}">{{ $item['name'] }}</a>
                <span class="badge">F</span>
            @else
                <a href="/finder?repo={{ $repo }}&path={{ $item['path'] }}">{{ $item['name'] }}</a>
                <span class="badge">D</span>
            @endif
        </li>
    @endforeach
</ul>
If the current item type is a file we create the link to the edit page, otherwise we create a link with the new folder path. We also add a badge to simplify file type identification and a go back link.
Editing Files
The Github\Api\Repository\Contents@show method returns either an array of items or an item with the correct file type.

When the file type is a file, the content will be base64 encoded. We won’t be dealing with other types such as submodule or symlink.
// app/Http/Controllers/GithubController.php

public function edit()
{
  $repo = Input::get('repo');
  $path = Input::get('path');

  try {
    $file = $this->client->api('repo')->contents()->show($this->username, $repo, $path);

    $content = base64_decode($file['content']);
    $commitMessage = "Updated file " . $file['name'];

    return View::make('file_update', [
        'file'    => $file,
        'path'    => $path,
        'repo'    => $repo,
        'content' => $content,
        'commitMessage'  => $commitMessage
    ]);
  } catch (\RuntimeException $e) {
    $this->handleAPIException($e);
  }
}//edit
// app/resources/views/file_update.blade.php
<ol class="breadcrumb">
<li><a href="{{ $file['download_url'] }}" target="_blank">Download</a></li>
<li><a href="{{ $file['html_url'] }}" target="_blank">View file</a></li>
</ol>
{!! Form::open(['url' => '/update', 'method' => 'POST']) !!}
<input name="path" value="{{ $path }}" type="hidden"/>
<input name="repo" value="{{ $repo }}" type="hidden"/>
<div class="form-group">
<label for="content">File content:</label>
<textarea class="form-control" name="content" id="content" cols="30" rows="10">{{ $content }}</textarea>
</div>
<div class="form-group">
<label for="commit">Commit message:</label>
<input class="form-control" type="text" id="commit" name="commit" value="{{ $commitMessage }}"/>
</div>
<div class="form-group">
<input type="submit" class="btn btn-primary btn-control" value="Submit" />
</div>
{!! Form::close() !!}After getting the file, we decode the content, create a standard commit message and generate the edit view. The other passed variables are needed for storing file updates.
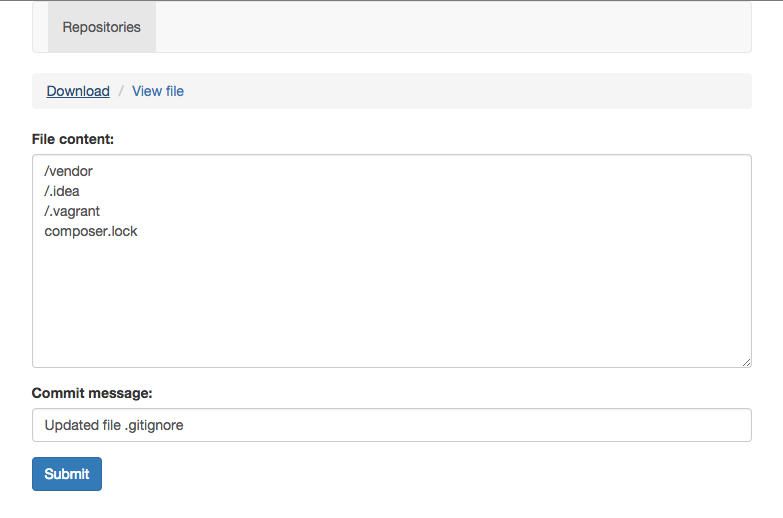
The /repos/:owner/:repo/contents/:path endpoint accepts three other required parameters along with the owner, repo and path. You can read more about repo content in the docs.
message: Commit message.content: File content.sha: File checksum.
// app/Http/Controllers/GithubController.php

public function update()
{
  $repo = Input::get('repo');
  $path = Input::get('path');
  $content = Input::get('content');
  $commit = Input::get('commit');

  try {
    $oldFile = $this->client->api('repo')->contents()->show($this->username, $repo, $path);
    $result = $this->client->api('repo')->contents()->update(
        $this->username,
        $repo,
        $path,
        $content,
        $commit,
        $oldFile['sha']
    );

    return \Redirect::route('commits', ['path' => $path, 'repo' => $repo]);
  } catch (\RuntimeException $e) {
    $this->handleAPIException($e);
  }
}//update
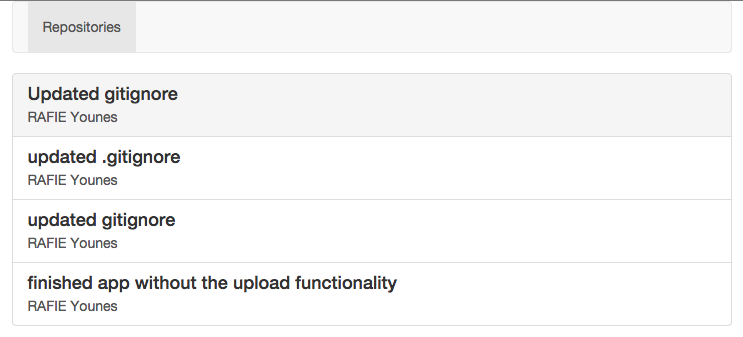
You can pass the file checksum as a hidden input inside our form like we did with the path to avoid calling the API, but I prefer this way. The last parameter to the update method is the branch which defaults to master. After a successful update we redirect the user to the commits page to view their latest commits.
Commits
The /repos/:owner/:repo/commits endpoint returns the list of commits for a certain repository. We also have the ability to filter commits by date range, author, or by path. You can read more about the supported parameters in the docs.
// app/Http/Controllers/GithubController.php

public function commits()
{
  $repo = Input::get('repo');
  $path = Input::get('path');

  try {
    $commits = $this->client->api('repo')->commits()->all($this->username, $repo, ['path' => $path]);

    return View::make('commits', ['commits' => $commits]);
  } catch (\RuntimeException $e) {
    $this->handleAPIException($e);
  }
}
The handleException method is only dumping the exception which occurred, but you can use the response code and the exception message to take appropriate action.
// app/Http/Controllers/GithubController.php

public function handleAPIException($e)
{
  dd($e->getCode() . ' - ' . $e->getMessage());
}
Conclusion
What I liked about the Github API is that it’s very readable. You can extend the demo by adding the ability to download the repo to your computer or create a filter for the commits page to easily filter through users commits, etc.
Github’s API gives you the ability to build some amazing tools using its data. In fact, there is a great one called GithubArchive built using the public API, be sure to check it out. If you have any comments or questions, leave them below.
Frequently Asked Questions (FAQs) about Using GitHub’s API with PHP
What is the GitHub API and how can I use it with PHP?
The GitHub API (Application Programming Interface) is a set of rules and protocols that allows developers to interact with GitHub’s data. It provides a way to automate tasks, manage repositories, and perform other actions on GitHub programmatically. To use it with PHP, you need to send HTTP requests to GitHub’s API endpoints. You can use PHP’s built-in functions like file_get_contents() or curl to send these requests. Once you receive the response, you can parse it using PHP’s json_decode() function.
How can I authenticate with the GitHub API using PHP?
GitHub API requires authentication for most of its endpoints. You can authenticate using a personal access token, which you can generate from your GitHub account settings. Once you have the token, you can include it in the header of your HTTP requests. For example, if you’re using curl, you can set the header like this: curl_setopt($ch, CURLOPT_HTTPHEADER, array('Authorization: token ' . $token));.
How can I handle errors when using the GitHub API with PHP?
When you send a request to the GitHub API, it returns a status code that indicates whether the request was successful or not. If the status code is 200, it means the request was successful. If it’s anything else, it means there was an error. You can check the status code using PHP’s http_response_code() function. If there’s an error, you can handle it appropriately, for example, by showing an error message to the user.
How can I retrieve data from a specific GitHub repository using PHP?
To retrieve data from a specific repository, you can send a GET request to the /repos/:owner/:repo endpoint of the GitHub API, where :owner is the username of the repository owner and :repo is the name of the repository. The API will return a JSON object containing information about the repository, which you can parse using PHP’s json_decode() function.
How can I create a new GitHub repository using PHP?
To create a new repository, you can send a POST request to the /user/repos endpoint of the GitHub API. You need to include a JSON object in the body of the request, containing the name of the repository and other optional parameters. You also need to authenticate with your personal access token. Once the repository is created, the API will return a JSON object containing information about the new repository.
How can I update a GitHub repository using PHP?
To update a repository, you can send a PATCH request to the /repos/:owner/:repo endpoint of the GitHub API. You need to include a JSON object in the body of the request, containing the parameters you want to update. You also need to authenticate with your personal access token. Once the repository is updated, the API will return a JSON object containing the updated information.
How can I delete a GitHub repository using PHP?
To delete a repository, you can send a DELETE request to the /repos/:owner/:repo endpoint of the GitHub API. You need to authenticate with your personal access token. Once the repository is deleted, the API will return a status code of 204, indicating that the deletion was successful.
How can I list all repositories of a GitHub user using PHP?
To list all repositories of a user, you can send a GET request to the /users/:username/repos endpoint of the GitHub API, where :username is the username of the user. The API will return a JSON array containing information about each repository, which you can parse using PHP’s json_decode() function.
How can I search for GitHub repositories using PHP?
To search for repositories, you can send a GET request to the /search/repositories endpoint of the GitHub API. You need to include a query parameter in the URL of the request, containing the search keywords. The API will return a JSON object containing the search results, which you can parse using PHP’s json_decode() function.
How can I handle rate limits when using the GitHub API with PHP?
GitHub API has a rate limit, which means you can only send a certain number of requests per hour. If you exceed the limit, the API will return a status code of 429. You can check the remaining number of requests by examining the X-RateLimit-Remaining header in the API’s response. If you’re close to the limit, you can delay your requests or implement a queue system to avoid exceeding the limit.
 Younes Rafie
Younes is a freelance web developer, technical writer and a blogger from Morocco. He's worked with JAVA, J2EE, JavaScript, etc., but his language of choice is PHP. You can learn more about him on his website.
